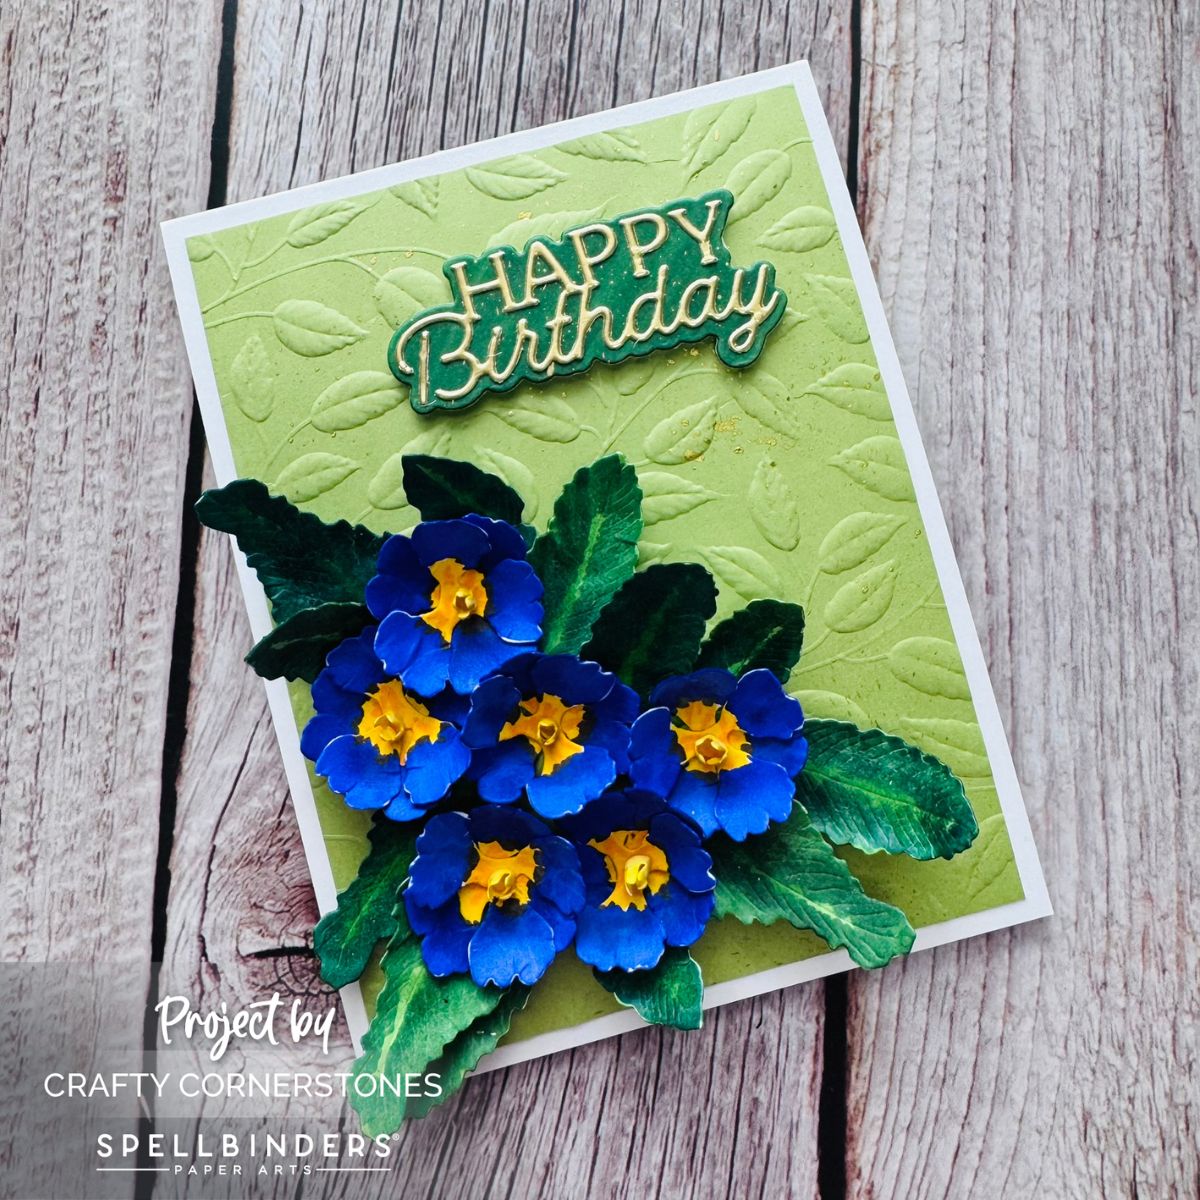
Exploring the Spellbinders Serenity Garden Collection
Today I’m starting a quick mini-series featuring the Serenity Garden Collection by Spellbinders, which launched in June. I love these floral sets because you can make the flowers with or without dimension — and for this first project, I decided to go all in on dimension. (It’s easier than you think!)

Coloring the Primroses
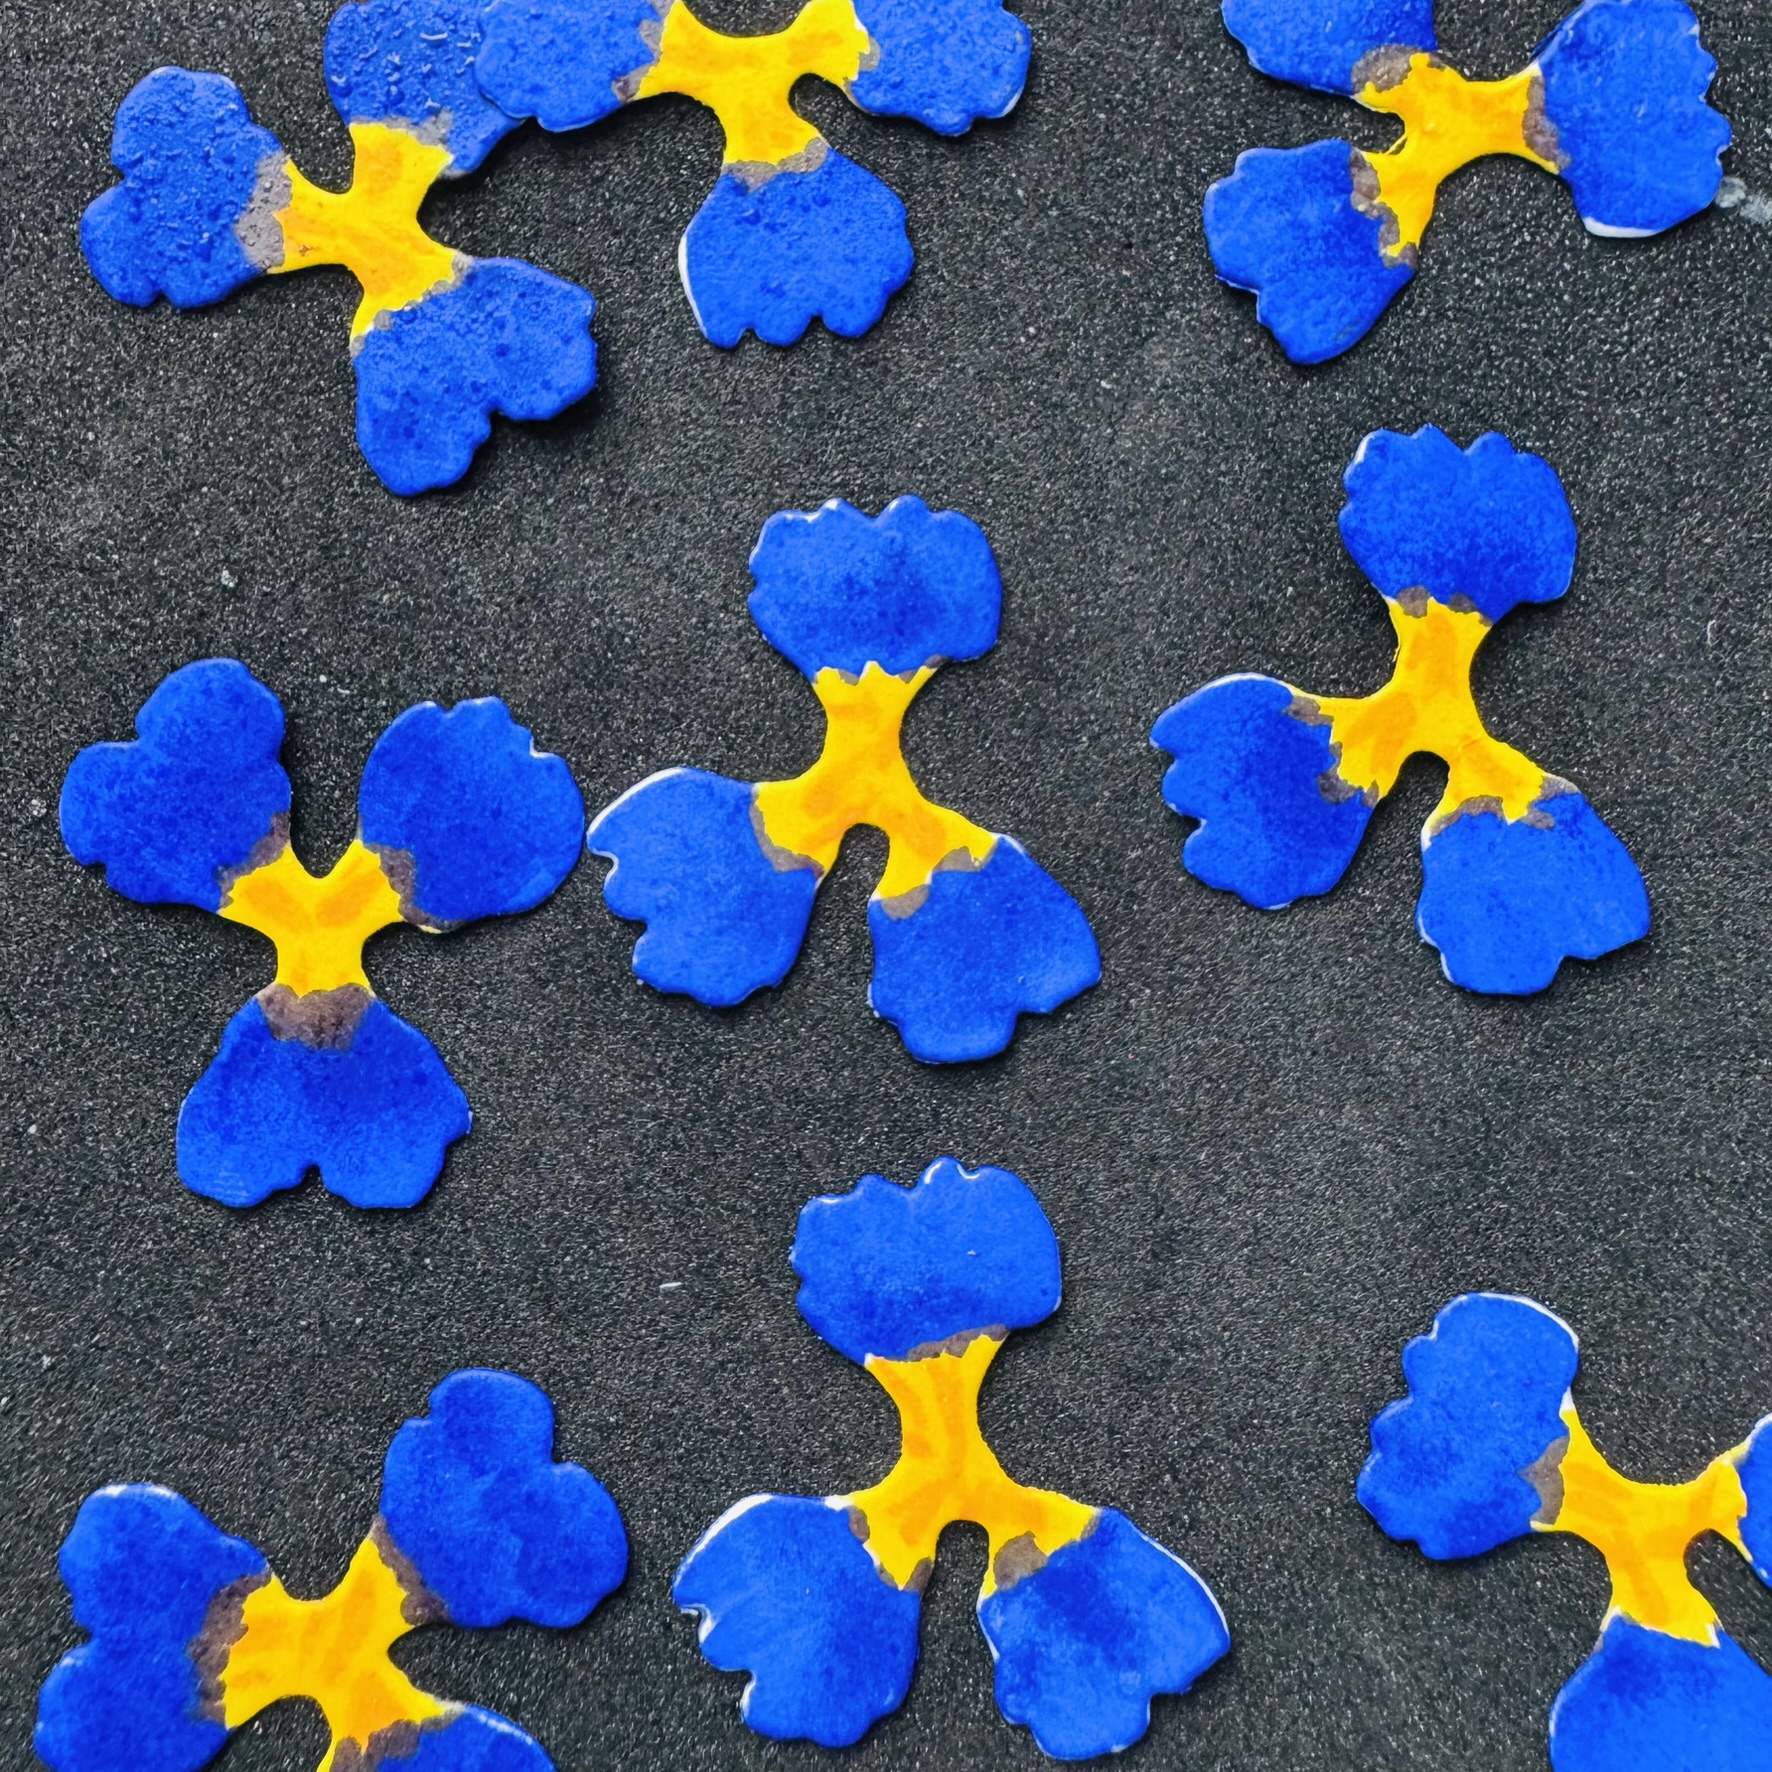
For my first project, I used the Primrose Die Set. I began by cutting all my flowers and leaves from Classic White Cardstock. I chose white so I could color each piece with Olo Markers, giving me more control than ink blending.

For the petals and centers, I used Y1.4, Y2.3, O2.4, and BV1.7 — yellows and oranges for the centers, violet for the petals. The contrast is beautiful and vibrant.
Shaping the Flowers
Shaping might sound intimidating, but it’s actually simple! I placed each petal on a foam shaping mat, lightly misted them with my Spellbinders Mister Bottle, and used a medium stylus ball to press in small circular motions. The mist makes the paper pliable and helps it hold its shape once dry.
To assemble, I stacked two cupped petals with liquid adhesive, offsetting them slightly to create a natural layered look.


Creating Realistic Leaves
While the petals dried, I colored the leaves using YG1.6, YG1.7, and G1.8 in layers for depth:
- Base layer: YG1.6 over the entire leaf (front and back).
- Middle layer: streaks of YG1.7 on the front, blended into the base.
- Final layer: touches of G1.8 near the tops for added richness.


To shape, I rolled the stylus from the center vein outward, then used a veining tool to trace the veins — this gave the leaves a natural curl and bend.
Building the Card
For the background, I embossed a green panel (4″ x 5.25″) using the Spellbinders Shady Leaves Embossing Folder, then added gold splatter with Winsor & Newton Gold Ink.
While that dried, I prepared my sentiment using the Spellbinders Layered Happy Birthday Die Set — cutting the shadow layer in dark green and the top layer in gold foil.
Once everything was ready, I adhered the embossed panel to an A2 card base (4.25″ x 5.5″), arranged my flowers and leaves, and added the sentiment with foam tape for lift. The result is a lush, dimensional floral card that feels like a garden in bloom.
For dimensional cards like this, I use a card box instead of an envelope — perfect for hand delivery or pairing with a gift.
Have You Tried Dimensional Florals?
Have you ever made a dimensional floral card? If not, will you give it a try?
Thank You
Thank you so much for stopping by Crafty Cornerstones! Your support through affiliate links helps me continue creating and sharing projects like this. I truly appreciate every visit and click — it means the world to me.
Continue the Serenity Garden Journey
If you’ve enjoyed today’s project, be sure to check out the other posts in this mini series featuring the Spellbinders Serenity Garden Collection! Each design highlights a different technique and product from the collection — from delicate florals to elegant embossed textures — all crafted to spark your creativity. You’ll find links to the previous projects below so you can follow along and gather even more inspiration for your next handmade card.
Other Posts in the Series
- Day 2: Poetic Foliage
- Day 3: Tassel Flower
- Day 4: Ode to a Poet
Supply List
- Spellbinders Serenity Garden Collection – Primrose Die Set
- Spellbinders Shady Leaves Embossing Folder
- Spellbinders Layered Happy Birthday Die Set
- Spellbinders Mister Bottle
- Olo Markers: Y1.4, Y2.3, O2.4, BV1.7, YG1.6, YG1.7, G1.8
- Free Resource – Olo Swatch Chart
- Winsor & Newton Gold Ink
- Classic White Cardstock
- Paper Sculpting Tools
- Liquid Adhesive
- Foam Tape
- Platinum 6 Die Cutting and Embossing Machine
- Paper Trimmer
- Score Board



Leave a Reply