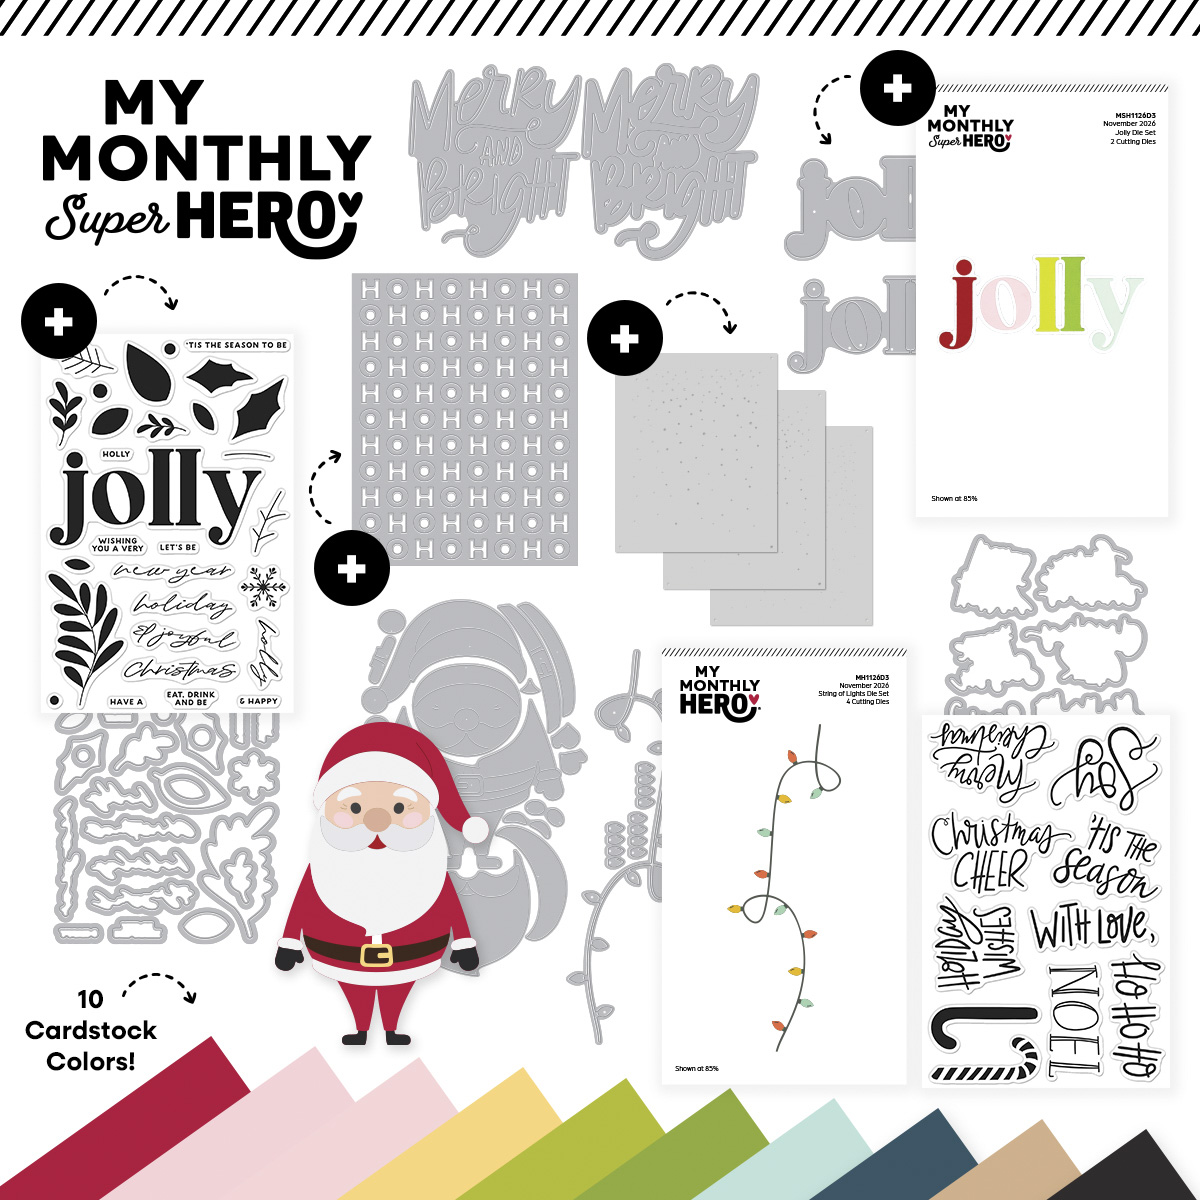
Get More from the Hero Arts November My Monthly Superhero Kit with These Five Easy-to-Mail Christmas Cards
One of my favorite ways to stretch the value of a cardmaking kit is to see just how many different styles of cards I can create from a single collection. The Hero Arts November My Monthly Superhero Kit made that challenge incredibly easy! Between the festive dies, versatile sentiments, and classic Christmas elements, I found myself with more ideas than time.
For today’s projects, I created five completely different Christmas cards using products from the kit. Even better, I intentionally kept each design fairly flat so they are easy to mail without worrying about extra postage.
Let’s take a look at each card!
Card One: Merry and Bright Christmas Lights Card

I started by doing all of my die cutting first. Using the String of Lights Die Set, I cut the light strand pieces twice from cardstock scraps. For the sentiment, I used the Merry and Bright die and cut the lettering from gold cardstock in the Treasured Gold Cardstock Pack. The shadow layer was cut three times from Raven cardstock and stacked together to create extra dimension without foam tape.
Once all of the pieces were prepared, I assembled the sentiment and added a touch of sparkle with a sparkle overlay pen.
For the card base, I used a 4.25″ x 5.5″ gold cardstock panel. A great way to stretch specialty cardstock is to die cut from the center of panels that will be covered later, so I actually cut the sentiment from the center of this gold layer.
The Raven panel was trimmed to 4″ x 5.25″ and splattered with Gold Rush Splatter Effects for a festive touch.
Before adhering the layers together, I centered the sentiment and arranged the light strands around the edges, trimming sections as needed to create a custom fit around the greeting. After adding the sentiment, I trimmed away any excess light strands and adhered the completed panel to the gold layer and then to an A2 card base.
Tip: Die cutting sentiment shadows multiple times creates dimension while keeping cards mailbox friendly.
Card Two: Stuck Santa Christmas Card

For this card, I was feeling just a little snarky, so poor Santa ended up stuck in the chimney.
Using the Big Santa Die Set, I cut the individual pieces from the following cardstock colors:
- Santa Body – Pomegranate
- Belt and Shoes – Raven
- Buckle – Gold cardstock from the Treasured Gold Cardstock Pack
- Coat Details – Classic White
After assembling Santa, I created the background using Indigo cardstock splattered with Sparkle Splatter Effects.
The chimney was handmade using Fog cardstock embossed with the Plaster 3D Embossing Folder. To add more definition and a realistic stone appearance, I lightly blended Hero Arts Charcoal Ink over the embossed texture.
For the sentiment, I used the Christmas Cheer Stamp & Cut Set. The greeting was stamped with Concord & 9th Midnight Ink and then heat embossed with Brutus Monroe Fairy Dust Embossing Powder for a subtle shimmer.
When assembling the card, I placed foam tape behind the chimney for a little dimension. Since I wanted the card to remain standard-mail friendly, I adhered both Santa and the sentiment directly to the background panel before adding the chimney.
If I were hand delivering this card, I would definitely increase the chimney height using thicker foam tape and add a wobble spring behind Santa so he could wiggle around while “stuck” in the chimney.
Card Three: HO HO HO Flocked Santa Card

This cheerful Santa card is one of my favorites from the group because of all the soft texture.
Before cutting the white die-cut pieces, I added double-sided adhesive to the top side of my white cardstock. Once the pieces were die cut, I removed the release paper and covered the adhesive areas with white flocking fibers.
The flocking created a wonderfully soft finish on Santa’s beard, hat trim, eyebrows, and pom-pom.
For Santa’s face, I used Chiffon cardstock and softly blended Hero Arts Cherry Ink onto the cheeks. While the die set includes cheek pieces, I wanted a more natural blended look. Santa’s nose was cut from Blush cardstock and lightly ink blended with the same Cherry Ink.
The hat and mouth pieces were cut from Pomegranate cardstock.
For the sentiment, I used the HO HO HO greeting from the Christmas Cheer Stamp & Cut Set. To add additional texture, I stamped it with embossing ink and heat embossed it using Brutus Monroe Marshmallow Fluff Embossing Powder.
For the background, I reached into my stash of previously embossed panels and selected a green panel embossed with the Whimsical Skies 3D Embossing Folder. The dimensional pattern adds interest while allowing Santa to remain the focal point.
Once everything was assembled, I adhered the finished panel to an A2 card base.
Tip: Adding adhesive before die cutting makes applying flocking fibers quick and easy, especially on intricate shapes.
Card Four: Christmas Cheer Holiday Card

For this card, I wanted the background itself to become part of the design.
I started by embossing a 4.25″ x 5.5″ panel using the HO HO HO Cover Plate Die and an embossing mat sandwich in my Platinum 6 Die Cutting Machine. After embossing, I trimmed the panel slightly smaller than 4″ x 5.25″.
A Pomegranate cardstock panel measuring 4.25″ x 5.5″ was prepared for the background layer.
The sentiment was stamped using Hero Arts Crimson Ink from the Christmas Cheer Stamp Set and cut out with the Hero Arts Squiggly Rectangle Frames Dies. I intentionally offset the die to create room for additional embellishments.
For the holly accents, I used the Let’s Be Jolly Stamp & Cut Set. The leaves were stamped with Concord & 9th Basil Ink and detailed with Hero Arts Unicorn Pigment Ink. The matching dies were used to cut the leaves, while the berries were die cut from Pomegranate cardstock.
To finish the card, I used low-profile foam tape behind the embossed panel to create subtle dimension without adding significant bulk. The sentiment was centered and adhered, followed by the holly leaves and berries.
The result is a classic Christmas card with lots of detail but very little extra thickness.
Card Five: Simple and Elegant Jolly Christmas Card

For my final card, I kept things clean, classic, and simple.
I began by splattering Gold Rush Splatter Effects onto a Fern cardstock panel.
Using the Strip Right Die, I cut strips from Pomegranate cardstock as well as 1/4″ strips from gold cardstock in the Treasured Gold Cardstock Pack.
The Jolly Die Set was used to cut the word “Jolly” from the same gold cardstock, while the shadow layer was cut from Classic White cardstock.
To help with alignment, I temporarily adhered the Fern panel to a scrap backing piece measuring approximately 4.25″ x 5.5″. I then added the cardstock strips one at a time using liquid adhesive, which gave me enough wiggle room to adjust placement as needed.
Once all of the strips were secured, I trimmed the panel to its final size and adhered it directly to a white A2 card base.
To finish the design, I added low-profile foam tape behind the Jolly sentiment and adhered it to the center of the card.
Sometimes simple really is best.
Final Thoughts on the Hero Arts November My Monthly Superhero Kit
I hope you enjoyed seeing these five holiday cards created from one kit. I absolutely love the versatility of the Hero Arts November My Monthly Superhero Kit. From elegant sentiments and playful Santa designs to classic Christmas imagery, this kit offers so many possibilities for holiday crafting.
Whether you enjoy clean and simple cards, dimensional die cutting, embossing, or interactive designs, there’s something in this kit that can easily become a staple in your Christmas cardmaking collection.
If you are not already subscribed to the My Monthly Superhero or My Monthly Hero programs, they are definitely worth taking a look at. The kits consistently provide a fantastic value while delivering products that mix and match beautifully with existing supplies.


I’d Love to Hear From You
Which of these five Christmas card designs is your favorite? Do you prefer elegant holiday cards, cute Santa cards, or clean and simple Christmas designs? Let me know in the comments below!
Thank you so much for stopping by Crafty Cornerstones today. I truly appreciate you spending part of your day with me and sharing in my creative journey. If you choose to shop through my affiliate links, thank you for your support. It helps me continue creating tutorials, inspiration, and crafty content for you at no additional cost to you.
Supply List
Hero Arts Products
- Hero Arts November My Monthly Superhero Kit
- String of Lights Die Set
- Merry and Bright Die Set
- Big Santa Die Set
- Christmas Cheer Stamp & Cut Set
- HO HO HO Cover Plate Die
- Let’s Be Jolly Stamp & Cut Set
- Squiggly Rectangle Frames Dies
- Treasured Gold Cardstock Pack
- Raven Cardstock
- Pomegranate Cardstock
- Indigo Cardstock
- Fog Cardstock
- Chiffon Cardstock
- Blush Cardstock
- Classic White Cardstock
- Fern Cardstock
- Gold Rush Splatter Effects
- Sparkle Splatter Effects
- Hero Arts Cherry Ink
- Hero Arts Charcoal Ink
- Hero Arts Crimson Ink
- Hero Arts Unicorn Pigment Ink
- Plaster 3D Embossing Folder
- Whimsical Skies 3D Embossing Folder
Additional Supplies
- Concord & 9th Midnight Ink
- Concord & 9th Basil Ink
- Brutus Monroe Fairy Dust Embossing Powder
- Brutus Monroe Marshmallow Fluff Embossing Powder
- White Flocking Fibers
- Liquid Adhesive
- Foam Tape
- Sparkle Overlay Pen
Basic Craft Room Supplies


Leave a Reply