Featuring the layered ornate eggs stencil from the Simon Hurley Happy Spring Collection by Spellbinders
Today’s project features the layered ornate eggs stencil from the Simon Hurley Happy Spring Collection by Spellbinders. I also pulled in two additional products from this collection, the bunny buddies die set and the ornate eggs embossing folder. I hope you enjoy how this one comes together so playful and fun.
Starting with the Star: layered ornate eggs stencil
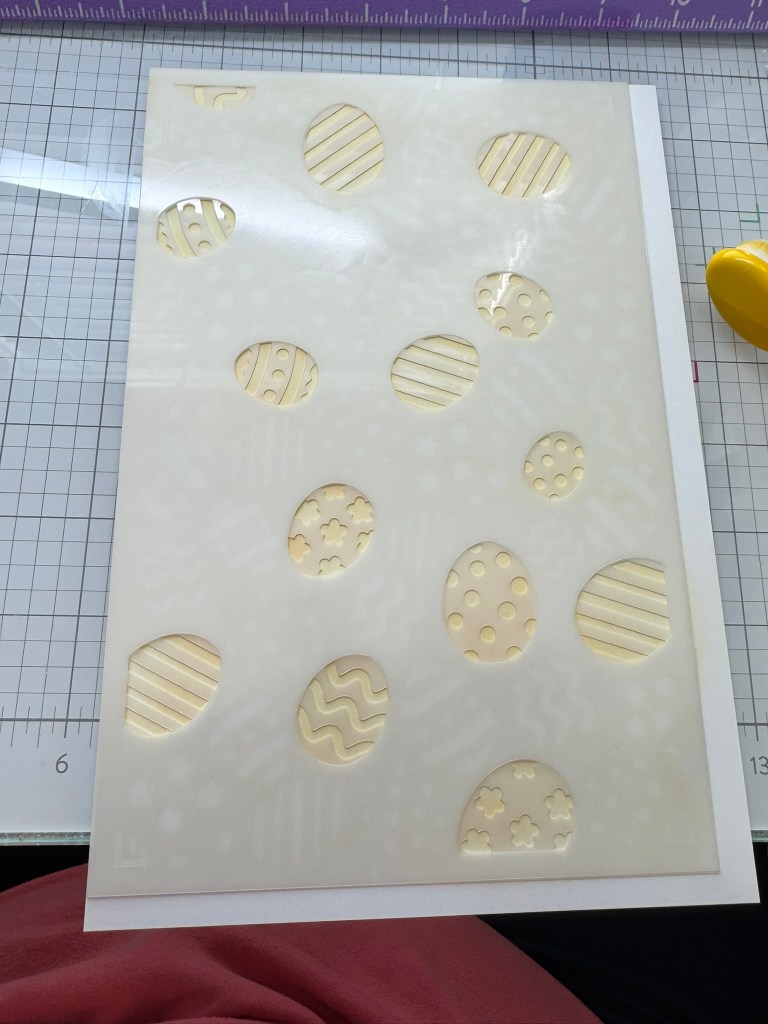
Since the stencil is the star of the show for this one, I started there. This stencil will cover a full 5.5 x 8.5 sheet of paper, so I went ahead and stenciled the entire area.
I began with stencils 1–4 and colored each layer in a different ink, using whatever was left on my ink brushes (and there was plenty). Once those layers were complete, I lined up stencil 5 with the already colored eggs to apply the detailed design.
Here’s the method that made this process easy and clean:
- I overlaid stencils 1-4 (one at a time) on top of stencil 5.
- I colored only the open eggs for that specific color.
- The stencil itself acted as a mask for the eggs I was not detailing.
- Having the detailed egg stencil on the bottom helped prevent my brush from slipping under the stencil and causing bleed.

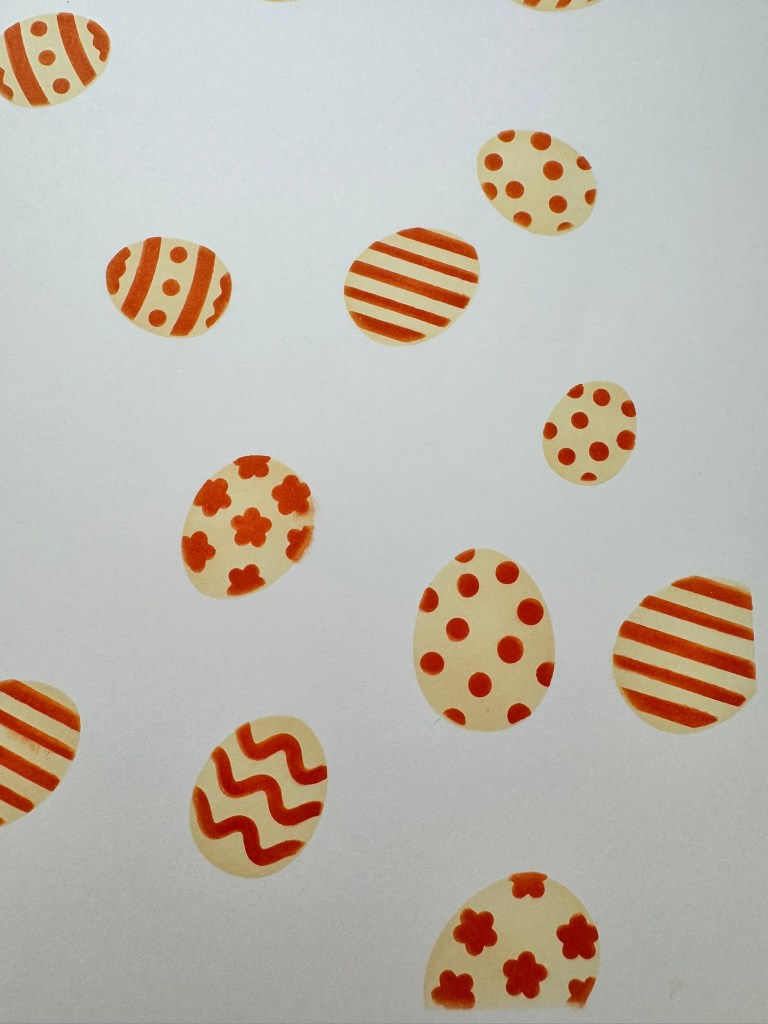
For the detail layer, I chose darker shades of the same color family:
- Yellow eggs: Tangerine Twist from Gina K
- Blue eggs: Blueberry from Concord & 9th
- Pink eggs: Honeysuckle from Concord & 9th
- Purple eggs: Medium Orchid from Gina K
This created dimension using only ink — no extra bulk, but lots of visual interest.
Creating the Background Panel
Once my background was complete, I cut the panel in half, saving one half for another project. The piece I used for today’s card was trimmed to 5.25 x 4 inches.
I love getting two panels from one stencil session. It makes the time investment feel even more worthwhile.
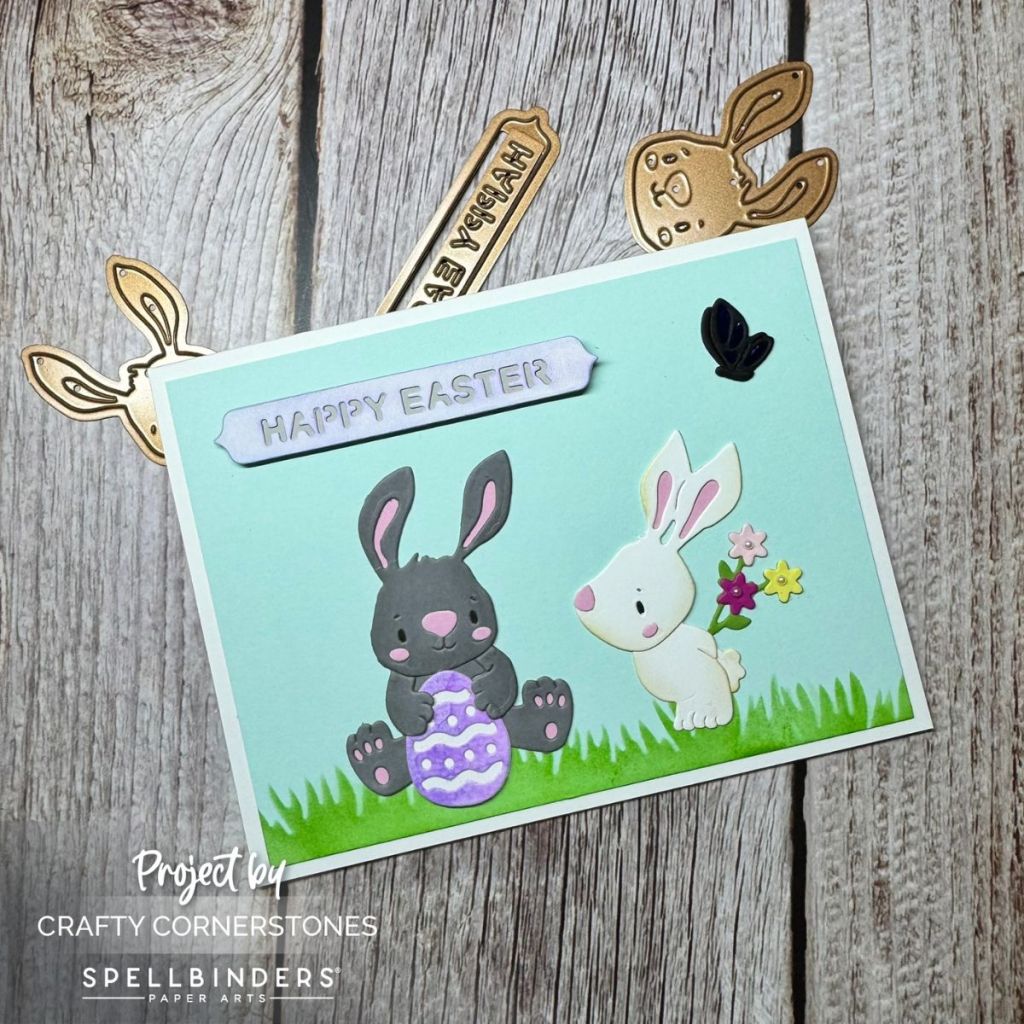
Adding Dimension with bunny buddies
Using the bunny buddies die set, I cut the standing bunny from:
- Fawn cardstock
- Flower and accents from Tutu, Rainforest, Wild berry, and Raven Spellbinders cardstock
Before assembling the bunny, I lightly ink blended the edges with a brown blending brush to add depth and dimension. This small step makes such a difference and keeps the bunny from looking flat against the colorful background.
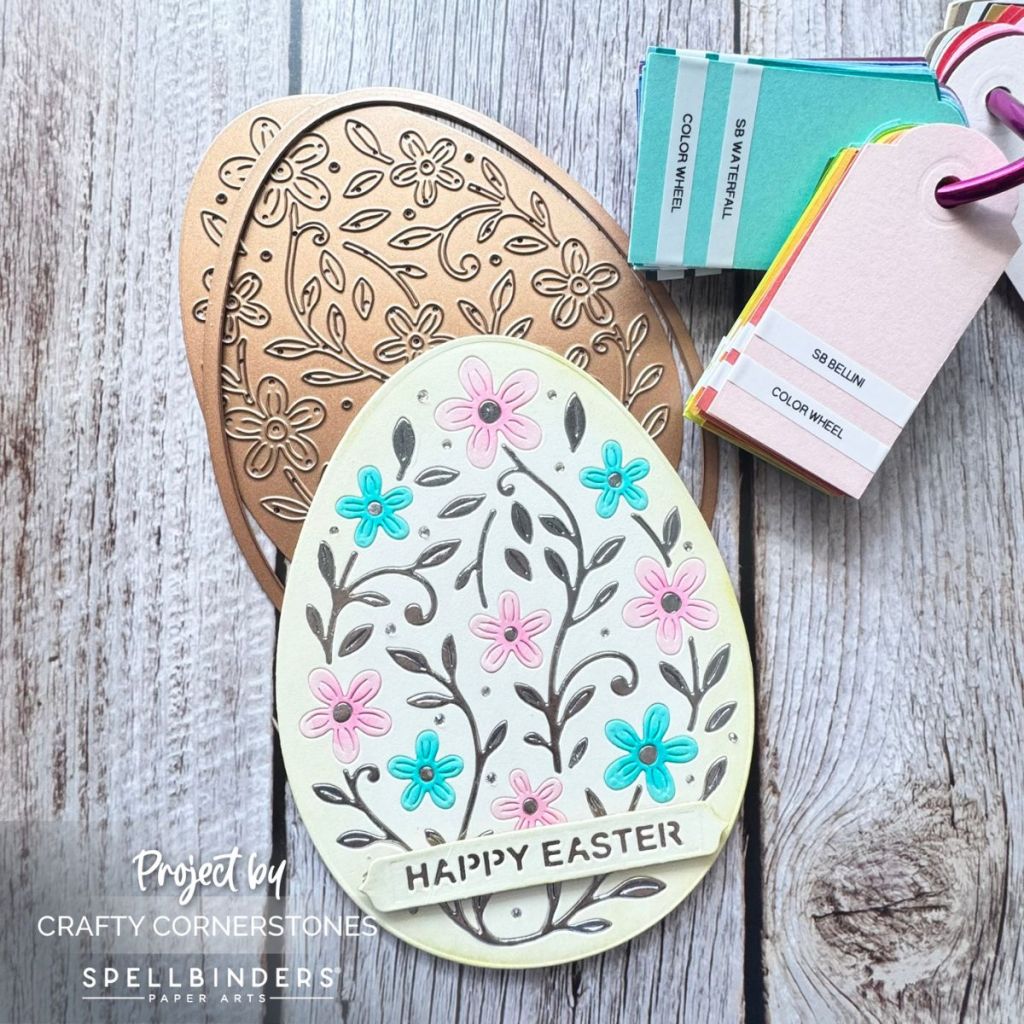
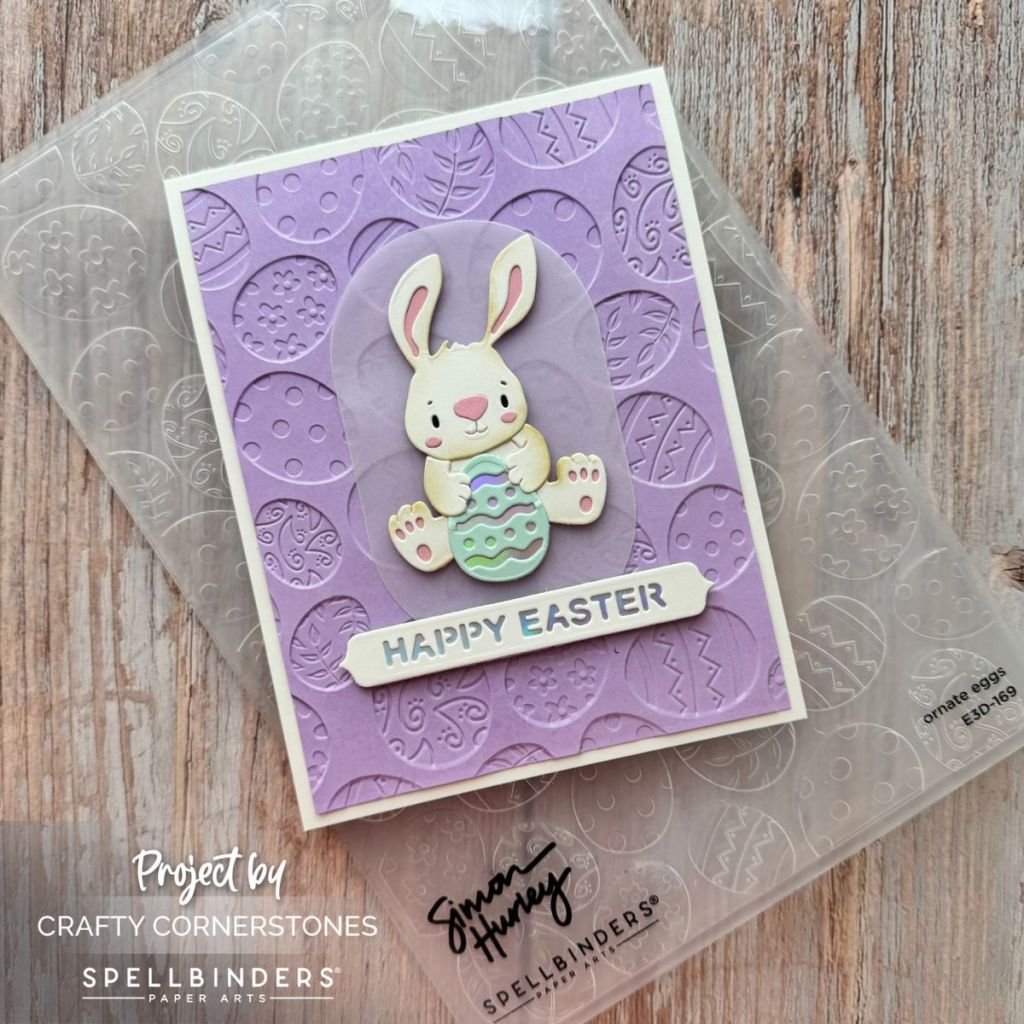
Embossed Layers with ornate eggs embossing folder
The bunny holding a flower was adhered to an oval cut with the Essential Stylish Ovals Die Set and embossed using the ornate eggs embossing folder.
To add a bit of elegance, I also cut a brushed silver oval one size larger using the same die set. The silver layer frames the embossed oval beautifully and ties in with the sentiment detail later on.
The bunny and both ovals were adhered together and set aside while I worked on the sentiment.
Die Cut Sentiment Strip
For the sentiment, I cut a ½-inch wide strip of white cardstock that was 5.5 inches long. Using the Happy Easter die from the bunny buddies set, I cut the sentiment from one end of the strip, leaving the other end intact.
I backed the strip with brushed silver cardstock that was slightly wider than the white strip. This subtle metallic layer helps the sentiment stand out without overwhelming the design.
The sentiment strip was adhered about halfway down the stenciled panel, and then I trimmed the excess flush with the edges.
Finishing the Card
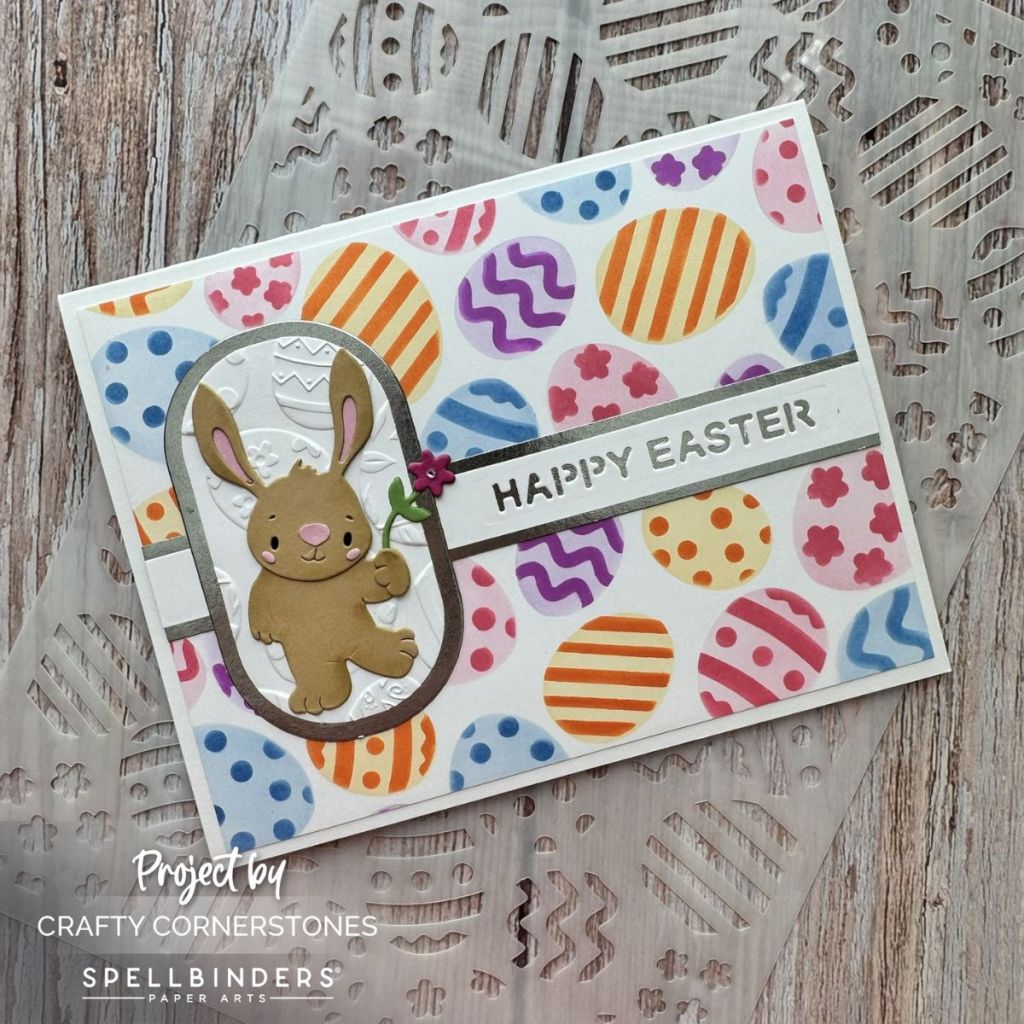
Once the sentiment was secured, I added the bunny oval on top. The entire image panel was then adhered to a white A2 card base, and the card was complete.
I have absolutely loved creating with the Simon Hurley Happy Spring Collection by Spellbinders. It has been especially fun building dimension with just inks so the cards remain mail-friendly and easy to send through the US mail without additional postage.
I already have more ideas in mind for this stencil. I am thinking a monochromatic version with just a pop of color on one or two eggs would be beautiful.
What are your plans for this stencil? Would you go bold and colorful or soft and subtle? I would love to hear your ideas in the comments below.
Thank you so much for stopping by Crafty Cornerstones. Your support, encouragement, and creativity mean more than you know. I am so grateful you take the time to visit and create along with me. When you choose to shop using my affiliate links, at no additional cost to you, it truly helps support this blog and allows me to continue bringing you more crafty inspiration, tutorials, and ideas. I appreciate you more than words can say.
Supply List
- Spellbinders layered ornate eggs stencil
- Spellbinders bunny buddies die set
- Spellbinders ornate eggs embossing folder
- Essential Stylish Ovals Die Set
- Gina K Tangerine Twist ink
- Gina K Medium Orchid ink
- Concord & 9th Blueberry ink
- Concord & 9th Honeysuckle ink
- Spellbinders cardstock: Fawn, Tutu, Rainforest, Wild berry, Raven
- Brushed silver cardstock
- Mini Blending brushes
- Medium Blending Brushes
- Platinum 6 Die cutting machine
- Bearly Arts Liquid Adhesive
Additional Happy Spring Collection Posts:
- Debossed Easter Bunny Card with the Simon Hurley Happy Spring Collection
- Elegant Paper Pieced Easter Card with the in bloom egg
- Sweet Easter Wishes with bunny buddies


Leave a comment