Leveling Up Holiday Tags with the Spellbinders Advent Calendar – Day 17
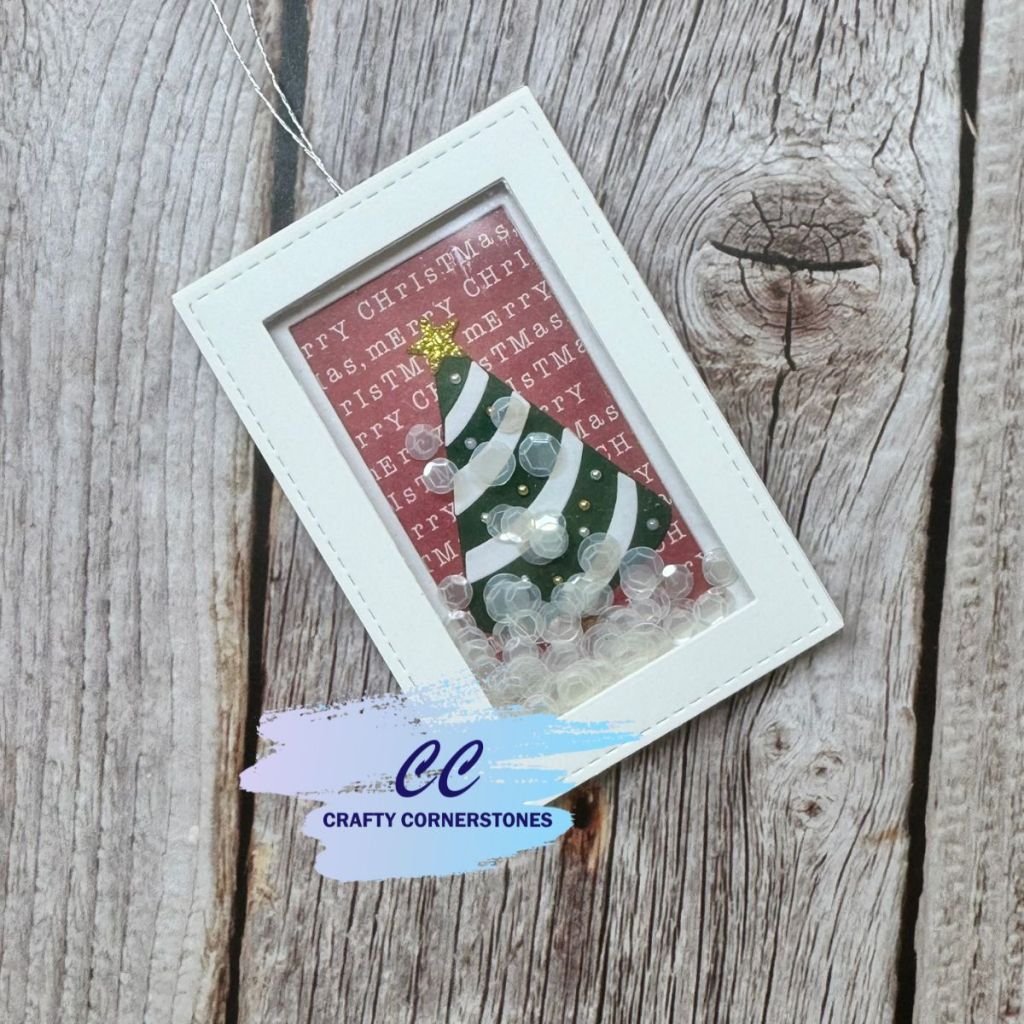
Shaker Gift Tag – Spellbinders Day 17
Today’s surprise in the Spellbinders Advent Calendar was a packet of clear sequins. As soon as I saw them, I knew exactly what I wanted to make — a shaker. Instead of creating a card, I decided to turn today’s project into a shaker gift tag.
I also chose to keep this project Christmas-themed. One of my personal creative challenges is to work on Christmas cards and tags all year long so I am prepared well before the holiday season arrives, instead of scrambling at the last minute.
Choosing Dies and Thinking Outside the Box
For my tag base, I used the star and one of the stitched rectangles from the Nested Tree Frame Die Set. The tree included in that set was just slightly larger than what I wanted for this tag, so I decided to get creative.
Using the Birthday Wreath Add-On Set, I repurposed one of the party hats along with the coordinating strip dies to create a stylized Christmas tree. This is one of my favorite ways to stretch my supplies — looking at dies beyond their original theme.
Creating a Multi-Layer Shaker Frame
With my Platinum 6 already out, I began die cutting the frame pieces. I cut five stitched rectangles from the Nested Tree Frame Die Set.
- Two pieces were set aside for later
- Three pieces were used to create the shaker structure
Using my Precision Layering Dies Sets A and B, I cut the centers out of those three rectangles. Two of these would become the front shaker layers, and one would be used on the inside back for added dimension.
For the two front layers, I stacked them together and held them in place with low-tack removable tape. I then centered a rectangle from the Precision Layering Dies and cut out the center, creating a sturdy shaker frame. This ensured the center of the frame is in the same spot on both pieces.
For the inside back frame, I used a slightly smaller rectangle to cut the opening. This gives the finished tag a subtle, layered frame look that adds interest without bulk.
Building the Tree and Embellishments
Next, I moved on to the tree elements. Using scrap paper, I cut the tree base from dark green cardstock and the snow layers from white cardstock. I die cut the star from gold glitter paper and trimmed a small strip of brown cardstock for the tree trunk.
Once assembled, the party-hat-turned-tree came together beautifully. I added small flat-back pearls randomly across the tree to resemble ornaments and set it aside to dry.
Assembling the Shaker Window
To create the shaker window, I cut a piece of acetate large enough to cover the opening in one of the front frame layers, making sure the stitching was facing outward.
The acetate was adhered to the back of the frame using double-sided tape. Liquid adhesive can be used, but tape speeds up the process. The second front frame layer was then adhered on top, sandwiching the acetate between the two stitched layers.
Creating the Back Panel
For the back of the tag, I felt the tree alone needed a little more visual interest. I added a piece of red and white Christmas patterned paper as the background.
The patterned paper was trimmed to the same size as one of the solid rectangles and adhered in place. The smaller stitched frame was layered on top, followed by the final full rectangle secured to the back with the stitching facing outward. This becomes the finished back of the tag.
Final Assembly and Shaker Fill
The tree was centered inside the back frame on top of the patterned paper.
Foam tape was added to the back of the front shaker frame, doubled up for extra dimension. Before securing the top piece of the foam tape, I wrapped my tag string around it and used the tape’s adhesive to hold it in place.
With the foam tape facing up, I placed the frame into the corner of my scoreboard to help with alignment. After removing the backing, I added the clear sequins and then carefully placed the tree panel on top, making sure the top of the tree lined up with the tag string.
Once secured, the shaker tag was complete.
A Tag That Makes an Impression
I love leveling up my tags this way. Shaker tags always bring a sense of joy and surprise, and seeing the delight on a recipient’s face makes the extra steps completely worth it.
Supply List
- Spellbinders Advent Calendar – Day 17 (Clear Sequins) (Sold Out)
- Alternate – Sparkling Clear Hexagon Confetti Sequins
- Spellbinders Nested Tree Frame Die Set
- Spellbinders Birthday Wreath Add-On Die Set
- Spellbinders Precision Layering Dies Sets A and B
- Spellbinders Platinum 6 Die Cutting Machine
- Acetate
- Cardstock: Dark Green, White, Brown
- Gold Glitter Paper
- Christmas Patterned Paper (Red and White)
- Flat Back Pearls
- Foam Tape
- Double-Sided Tape
- Low-Tack Removable Tape
- Tag String
Thank you so much for stopping by Crafty Cornerstones. Be sure to subscribe so you don’t miss future projects. Using my affiliate links is never an extra cost to you and helps me continue sharing crafty inspiration. I’d also love to hear from you—leave a comment below and let me know what you’re creating.
Missed a 2025 Advent Project? Links Below
Spellbinders 2025 Advent
- Spellbinders Advent Day 1
- Spellbinders Advent Day 2
- Spellbinders Advent Day 3
- Spellbinders Advent Day 4
- Spellbinders Advent Day 5
- Spellbinders Advent Day 6
- Spellbinders Advent Day 7
- Spellbinders Advent Day 8
- Spellbinders Advent Day 9
- Spellbinders Advent Day 10
- Spellbinders Advent Day 11
- Spellbinders Advent Day 12
- Spellbinders Advent Day 13
- Spellbinders Advent Day 14
- Spellbinders Advent Day 15
- Spellbinders Advent Day 16
Pink and Main 2025 Advent
- Pink and Main Day 1
- Pink and Main Day 2
- Pink and Main Day 4
- Pink and Main Day 5
- Pink and Main Day 6
- Pink and Main Day 7
- Pink and Main Day 8
- Pink and Main Day 9
- Pink and Main Day 10
- Pink and Main Day 11
- Pink and Main Day 12
- Pink and Main Day 13
- Pink and Main Day 14
- Pink and Main Day 15
- Pink and Main Day 16


Leave a reply to Pink and Main Day 17 Well Wishes Floral Card – Crafty Cornerstones Cancel reply