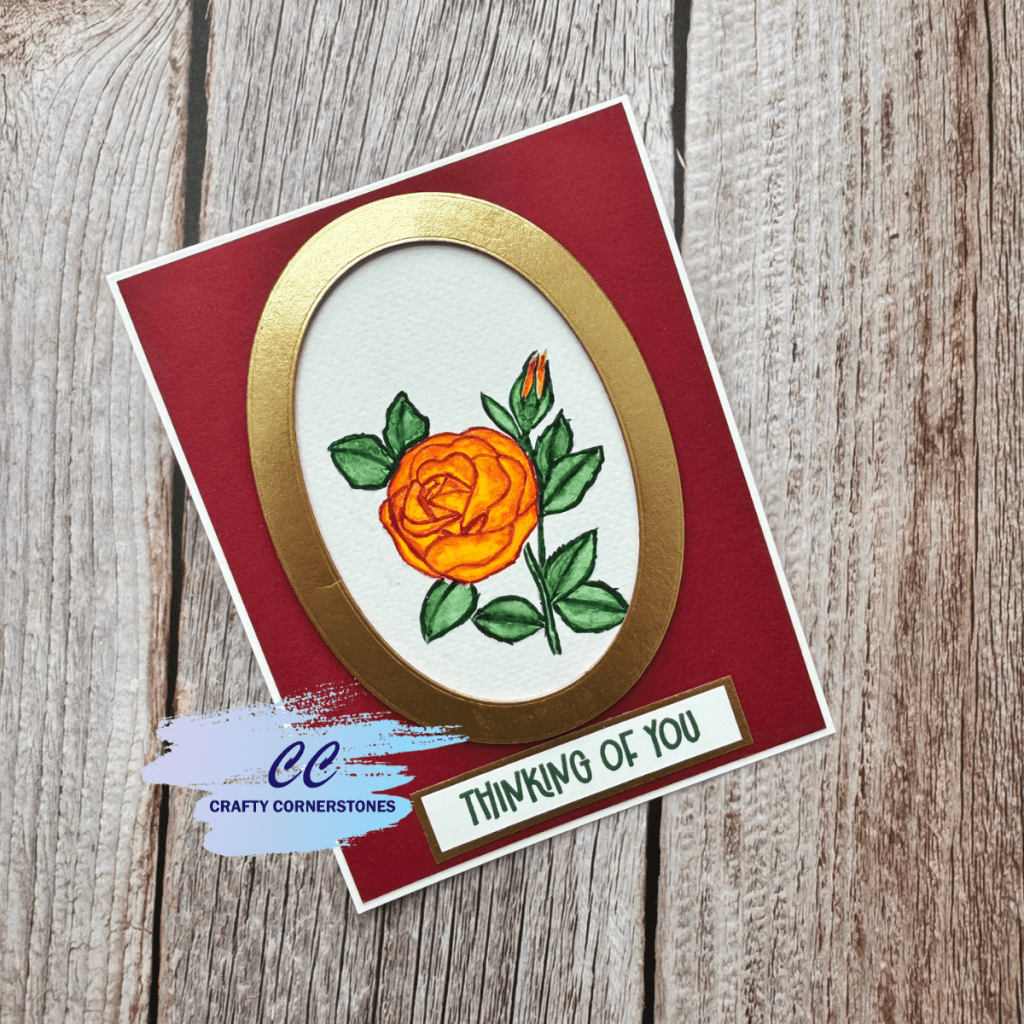
Watercolored Flower Card Using the Pink and Main Day 10 Advent Surprise
Today’s surprise from the Pink and Main Advent Calendar was a beautiful rose stamp paired with a coordinating sentiment, and I could not have been more excited. Roses are such a timeless flower, and one of the things I love most about them is the endless color possibilities they offer.
Instead of creating a traditional single-color rose, I decided to step outside my comfort zone and try watercoloring. Watercoloring is definitely not my strongest technique and something I still need a lot of practice with, but I was really pleased with the overall result of this card.
Why I Chose a Two-Toned Rose Design
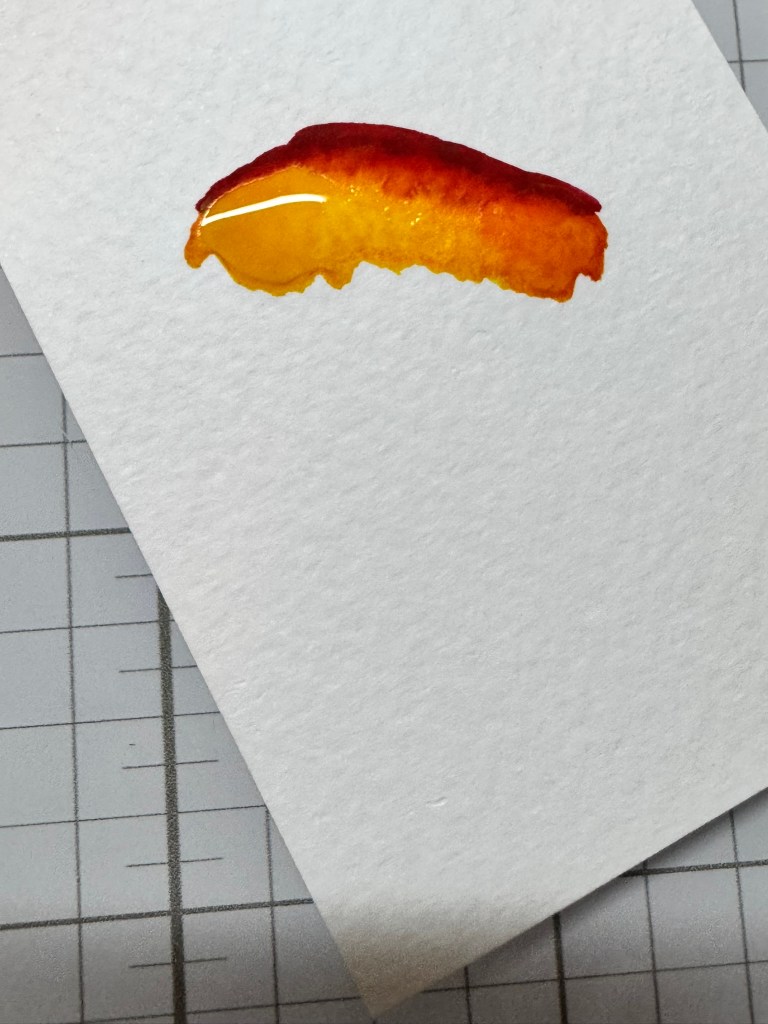
One of my favorite roses is a two-toned variety with bright yellow petals and vibrant red tips. I initially considered using brush-tip alcohol markers, but the brush tip was too harsh for the result I wanted to achieve. Colored pencils weren’t quite right either, I didn’t have the exact colors I wanted, so watercolor felt like the perfect solution.
This project ended up being a great reminder that sometimes the best creative choice is the one that pushes us to try something new.
No-Line Stamping for a Softer Look
To avoid harsh black outlines, I stamped the rose using Gina K Whisper Ink. This created a soft, no-line stamped image that works beautifully with watercolor. It allows the painted areas to shine without heavy lines competing for attention.
Preparing for Watercoloring
Before I started painting, I prepped my watercolors by lightly spraying each pan of color I planned to use and letting them sit for a few seconds. While the paints activated, I gathered the rest of my supplies.
For this project, I used:
- Two watercolor brushes (one fine tip and one slightly larger)
- Two cups of water (one for clean water and one for rinsing)
- A paper towel for removing excess water
Watercoloring the Rose
I began by working on the rose petals. Using a fine-tip brush, I traced the edges of the petals directly onto dry watercolor paper with red paint. This helped create the crisp red tips I was aiming for.

Once the red was completely dry, I painted the main portion of each petal with yellow. Letting the layers dry between steps was important to keep the colors controlled.
To create a soft bloom where the red meets the yellow, I used a clean brush dipped in clean water and gently tapped off the excess on a paper towel. I carefully added water right where the two colors met, avoiding the very edge of the red. This allowed the red to gently bloom into the yellow. Once this step was done, I walked away and let the watercolor do its thing without overworking it.
After the rose was fully dry, I painted the leaves and stem using a similar approach. I outlined them with a darker green, then added clean water inside the shapes and pulled the color inward to create a subtle two-toned effect.
Sentiment and Card Layout
While the painted image dried, I worked on the sentiment and card layout. I stamped the sentiment onto the same watercolor paper used for the image. Watercolor paper has a softer white tone than standard cardstock, which helps create a more cohesive finished card. The sentiment was stamped using Evergreen Ink from Concord & 9th.
To frame the flower, I used two oval dies to create a brushed gold oval frame. I trimmed the sentiment and added a brushed gold layer behind it to coordinate with the frame. The frame was backed with 1 mm foam tape to add subtle dimension.
Once the image was completely dry, I used a third oval die to cut the painted rose so the image extended beyond the inner edge of the frame without reaching the outer edge. The frame was centered and adhered to the image panel.
Final Assembly
For the card base, I cut dark red cardstock to 4” by 5.25” and adhered it to an A2 card base. The framed rose and matted sentiment were then adhered to finish the card.
Final Thoughts
Even though watercoloring is not my strongest technique, I truly enjoyed the process. Watching the colors bloom into each other was relaxing, and I’m excited to practice more watercolor techniques in 2026.
I encourage you to step outside your comfort zone and try something new in your crafting. You may not love every technique you try, but you just might discover a new favorite along the way.
What technique do you want to explore more in 2026?
https://tidd.ly/457LT31Are you enjoying the Pink and Main Advent Calendar as much as I am? Have you thought about signing up for the upcoming Pink and Main Birthday Bash? It is going to be EPIC! I mean just look at that instructor line up in the graphic below!
DO NOT WAIT SIGN UP TODAY

EVENT KITS WILL NOT SHIP UNTIL CLOSER TO THE EVENT – PLEASE DO NOT ADD OTHER ITEMS TO YOUR PURCHASE!
REMINDER! If you’re signing up for the Birthday Bash Virtual Event, the kit will not ship for a few months! If you add anything else to your order, it will be delayed until the kits ship!
Missed a 2025 Advent Project? Links Below
Spellbinders 2025 Advent
- Spellbinders Advent Day 1
- Spellbinders Advent Day 2
- Spellbinders Advent Day 3
- Spellbinders Advent Day 4
- Spellbinders Advent Day 5
- Spellbinders Advent Day 6
- Spellbinders Advent Day 7
- Spellbinders Advent Day 8
- Spellbinders Advent Day 9
- Spellbinders Advent Day 10
Pink and Main 2025 Advent
- Pink and Main Day 1
- Pink and Main Day 2
- Pink and Main Day 4
- Pink and Main Day 5
- Pink and Main Day 6
- Pink and Main Day 7
- Pink and Main Day 8
- Pink and Main Day 9
Thank you so much for stopping by Crafty Cornerstones. Be sure to subscribe so you don’t miss future projects. Using my affiliate links is never an extra cost to you and helps me continue sharing crafty inspiration. I’d also love to hear from you—leave a comment below and let me know what you’re creating.
Supply List
- Pink and Main Rose Stamp and Sentiment (Day 10 Advent)
- Gina K Whisper Ink
- Watercolor Paints
- Watercolor Paper
- Watercolor Brushes (fine tip and medium)
- Concord & 9th Evergreen Ink
- Oval Dies (3 sizes)
- Brushed Gold Cardstock
- Dark Red Cardstock
- White A2 Card Base
- 1 mm Foam Tape
- Adhesive
- Paper Towel
- Two Cups of Water


Leave a reply to Pink and Main Day 11: Simple Get Well Card with Patterned Paper – Crafty Cornerstones Cancel reply