One of my favorite surprises is a coordinating die, and that is exactly what we received for Pink and Main Advent Day 7. Today’s gift was a die designed to cut out the floral stamps from Days 2, 4, and 6. Since I am not a fan of fussy cutting, this was a very welcome addition to the advent calendar.
For today’s project, I wanted to show how well the Pink and Main Advent products work together. In fact, this card uses items from five of the seven days we have opened so far, making it a great example of how thoughtfully this advent calendar is designed.
Card Design Inspiration
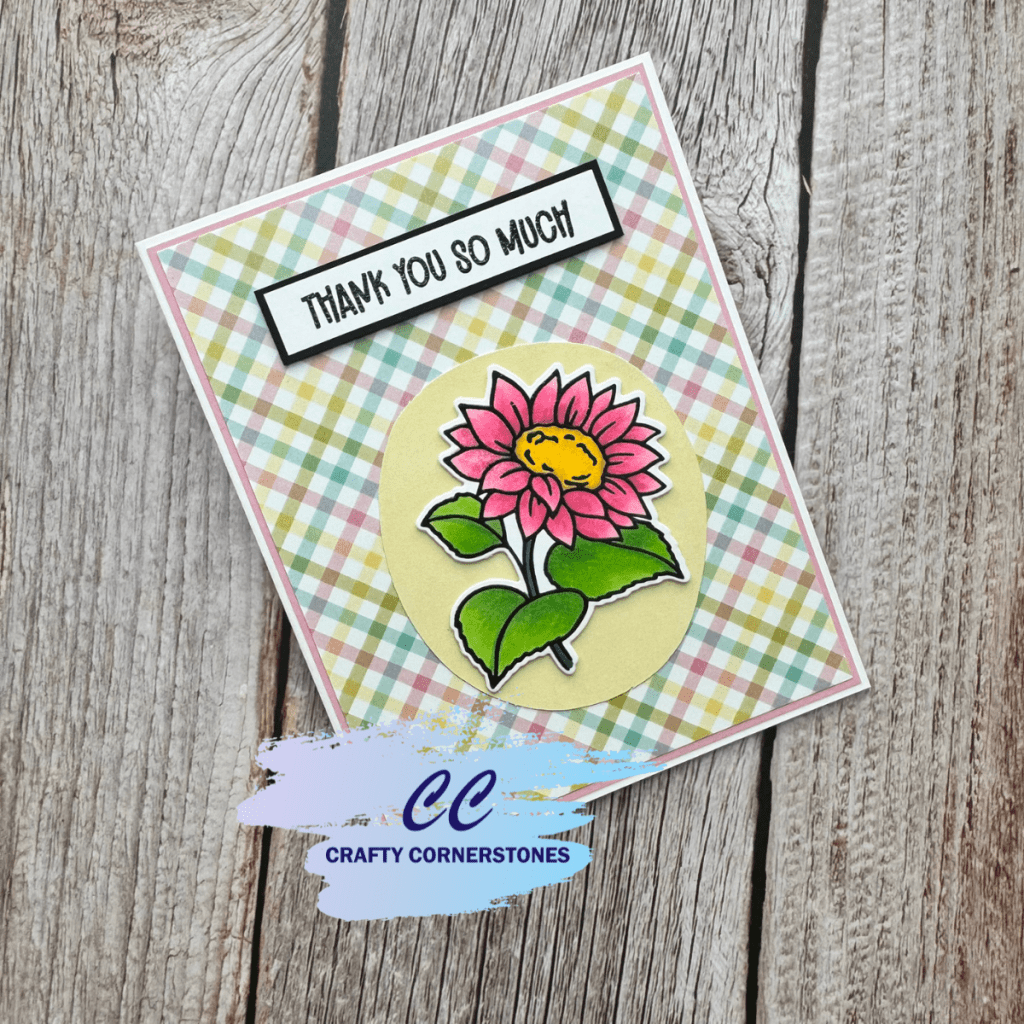
For my main focal image, I chose the sunflower stamp from Day 2, but instead of coloring it like a traditional sunflower, I decided to turn it into a pink daisy. This is one of my favorite things about art—you get to interpret it how you like, flowers do not have to be realistic . Get creative with your color choices and make them your own. Art is such a wonderful creative outlet, and breaking the “rules” can be part of the fun.
For the sentiment, I used the “Thank You So Much” sentiment from the Day 4 stamp set, keeping the card versatile and perfect for many occasions.
Stamping and Embossing the Images
I followed the same stamping and embossing process I have used throughout this entire Pink and Main Advent series:
- Stamp the image in black ink
- Stamp again using embossing ink
- Heat emboss with clear embossing powder
If you would like more detailed, step-by-step instructions for this process, be sure to check out my other Pink and Main Advent posts linked below.
Once the stamped image was ready, I colored it using alcohol markers.
Alcohol Marker Coloring
- Petals:
Olo RV 0.6, RV 0.4, RV 0.2 - Stem:
Olo G 1.8 - Leaves:
Olo YG 1.6, YG 1.4 - Floral Center:
Olo Y 8.6, YO 2.3, YO 2.2
After coloring, I used the coordinating die from Day 7 to cut out the floral image. You could certainly die cut first and color afterward, but I find it easier to hold and rotate the image while coloring when I die cut after.
I also cut the sentiment and a black mat layer using a hand trimmer. The sentiment and mat were adhered together and set aside for final assembly.
Creating the Card Layout
For the card design, I used one of the Marker Spotlights from Day 3 as a grounding panel for the floral image. This adds interest without overwhelming the focal point.
Background Layers
To create a multi-layered frame effect, I used two background layers plus a white card base:
- Patterned Paper (Day 1):
Cut slightly smaller than 4″ x 5.25″, choosing a pattern that complemented the floral colors. - Pink Cardstock (from my stash):
Cut approximately 1/8″ larger than the patterned paper layer (about 1/16″ on each side).
Using layered panels like this is a great way to hide small cutting mistakes. My patterned paper was slightly off, so trimming and layering helped everything look clean and intentional.
The final layer was a standard white card base.
Final Assembly and Dimension
After adhering the pink cardstock and patterned paper to the card base, I played around with placement until I found a layout I loved. I ultimately decided to place the sentiment in the top third of the card and the Marker Spotlight with the floral image in the lower two-thirds of the panel.
To add a bit of dimension, I used foam tape behind both the sentiment and the floral image. The Marker Spotlight panel was adhered flat to the card, with the floral image layered on top for a subtle but effective dimension.
Finished Card Thoughts
I am so pleased with how this card turned out. It was a fun challenge to use multiple days from the Pink and Main Advent Calendar in one project, and it really highlights how cohesive and well-planned this advent calendar is. If you enjoy mixing and matching products, this is a great example of how easily these designs work together.
Thank you so much for stopping by Crafty Cornerstones today. I hope this card inspires you to look at your stamps and dies in new and creative ways.
Supplies Used
- Pink and Main Advent Calendar 2025 (sold out)
- Day 2 Floral Stamp Set
- Day 4 Sentiment Stamp Set (more sentiment stamps can be found here)
- Day 7 Coordinating Floral Die
- Day 3 Marker Spotlight (exclusive to this event but try the coordinating stencil)
- Day 1 Patterned Paper (exclusive to this event, but great options located here)
- Black Ink
- Embossing Ink
- Clear Embossing Powder
- Heat Tool
- Olo Alcohol Markers (colors listed above)
- White Cardstock (card base)
- Pink Cardstock (from stash)
- Foam Tape
- Adhesive
- Die Cutting Machine
- Paper Trimmer
Are you loving the Pink and Main Projects? Do not miss the upcoming Birthday Bash! It is going to be EPIC! I mean just look at that instructor Line up in the graphic below!

Early Bird Pricing Ends Dec 19th…DO NOT WAIT SIGN UP TODAY
EVENT KITS WILL NOT SHIP UNTIL CLOSER TO THE EVENT – PLEASE DO NOT ADD OTHER ITEMS TO YOUR PURCHASE!
REMINDER! If you’re signing up for the Birthday Bash Virtual Event, the kit will not ship for a few months! If you add anything else to your order, it will be delayed until the kits ship!
Missed a 2025 Advent Project? Links Below
Spellbinders 2025 Advent
- Spellbinders Advent Day 1
- Spellbinders Advent Day 2
- Spellbinders Advent Day 3
- Spellbinders Advent Day 4
- Spellbinders Advent Day 5
- Spellbinders Advent Day 6
- Spellbinders Advent Day 7
Pink and Main 2025 Advent
Thank you so much for stopping by Crafty Cornerstones. If you enjoy these projects, be sure to subscribe so you don’t miss future tutorials. Using my affiliate links is never an extra cost to you and helps support the creation of more crafty inspiration. I always love reading your comments, so feel free to leave one below.


Leave a reply to Day 8 Spellbinders Advent – Happy Day Banner Card – Crafty Cornerstones Cancel reply