Wow, we are already on Day 4 of the Spellbinders Advent Calendar, and I have seen so many great projects being shared. Today’s surprise was a good old-fashioned red rubber stamp. At first glance, I honestly was not quite sure what it was. My first thought went straight to the red stamp used on invoices that says “PAID.” It actually took a few minutes before the full image came together in my mind.
I am so curious to see what everyone else imagined when they opened today’s door. Was it a wax seal? A small shelf? Or did you immediately see the banner and backer pieces? That is one of the things I love most about Advent calendars—how different each creative mind interprets the same design.
Putting the Project Together
Once I realized what today’s die set was meant to be, the project came together fairly simply using just a few staples from my craft room.
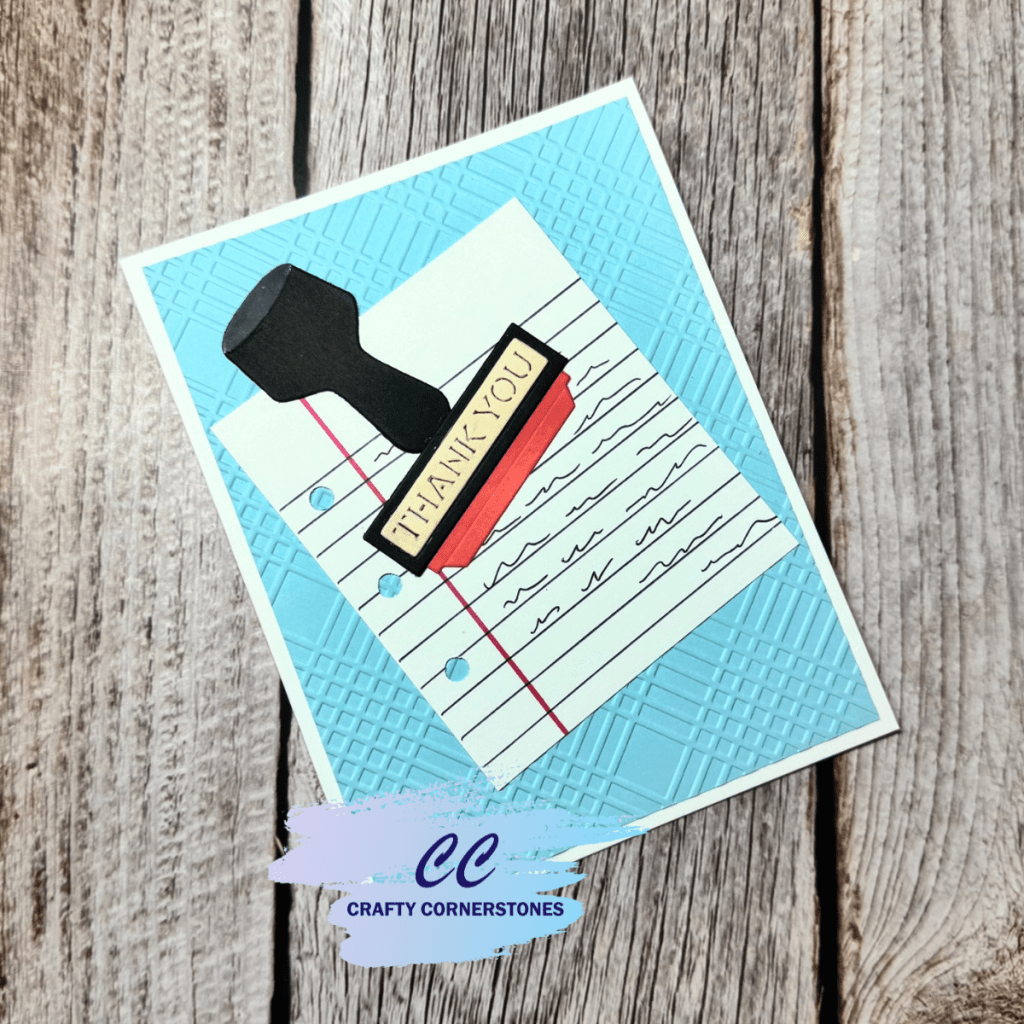
For the base background layer, I used Spellbinders Breeze cardstock and trimmed it to 4” x 5 1/2”. This allowed a crisp white frame to show around the finished design. After trimming, I embossed the panel using the Spellbinders Diamond Plaid embossing folder to add subtle texture and interest.
For the notebook-style paper layer, I started with a rectangle of white cardstock. Using a T-Ruler and a blue ballpoint pen, I added horizontal lines at 1/4” increments. For the long red line, I grabbed a red alcohol marker and again used the T-Ruler to keep everything straight. The holes were created with a single hole punch. To finish off the look, I added black pen squiggles to mimic handwriting.
Creating the Old-Fashioned Red Rubber Stamp
For the stamp handle, I die cut the main piece from both Anchor and Raven cardstock. I trimmed the top flat oval off the Anchor version and adhered it on top of the same area on the Raven die cut. This gave the handle a bit of extra dimension.
For the sentiment portion, I cut the backer from Raven cardstock and the “Thank You” sentiment from an off-white scrap. The red rubber portion was cut from an old piece of paper I had previously blended with Distress Oxide ink and never ended up using—perfect for giving that red rubber look.
Once all the pieces were assembled, I arranged everything on the embossed background until I was happy with the layout and adhered it all down. After adhering everything down, I attached the entire panel to a white A2 card base.
Spellbinders Advent Day 4 Final Thoughts
I hope today’s project inspires you to look at your Advent dies in new ways. Be sure to tell me in the comments what you did with your Day 4 die from Spellbinders. Did you use it as a stamp, or did you find a completely different creative use for it? I would love to know.
Supplies Used
- Spellbinders Advent Calendar 2025 – Day 4 Die Set
- Spellbinders Breeze Cardstock
- White Cardstock (A2 card base + lined paper panel)
- Raven Cardstock
- Anchor Cardstock
- Off-white Cardstock Scrap (for sentiment)
- Distress Oxide Blended Scrap Paper (for red rubber portion)
- Spellbinders Diamond Plaid Embossing Folder (discontinued)
- Blue Ballpoint Pen
- Black Pen (for faux writing)
- Red Alcohol Marker
- T-Ruler
- Single Hole Punch
- Adhesive of Choice
- Die Cutting Machine


Leave a reply to Discovering Versatile Dies: Day 8 Pink and Main Advent Calendar – Crafty Cornerstones Cancel reply