Day four of the Pink and Main Advent brought us another beautiful floral design, and this time it features elegant Tulips. I have been absolutely loving all of the floral images in this release because of their versatility. You can turn them into birthday cards, encouragement cards, thinking of you projects, and today I chose to create a simple Thank You card.
Designing the Tulip Card
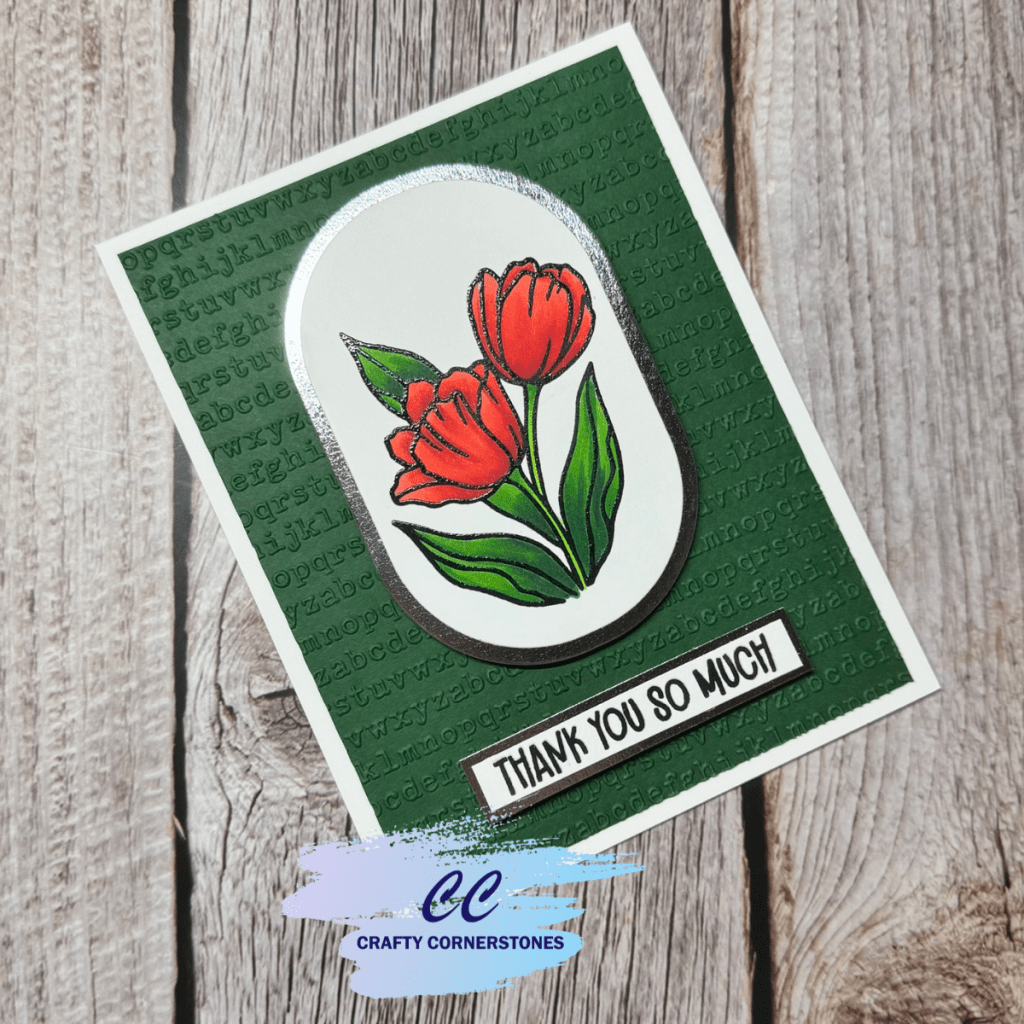
The first step was to stamp the tulip image onto white cardstock using black alcohol-marker friendly ink. For added protection and clean lines, I restamped the image using clear embossing ink and heat embossed it with clear embossing powder. This step helps prevent ink smearing while coloring and avoids the stray flecks that can sometimes happen with black embossing powder.
I colored the tulip image using my Olo alcohol markers with the following color combinations:
- Stem: YG1.6 and YG1.4
- Leaves: G1.8, G1.7, and YG1.6
- Flower: R.06, R.05, and R.04
Once the coloring was complete, I moved on to the card layout. I wanted the floral image to be the focal point, so I die cut it using the Stylish Ovals from Spellbinders. I then cut an additional oval using the next size up from matte silver foil cardstock. This created a clean, elegant frame for the image.
For the background layer, I used a dark green cardstock. While the color was perfect, it felt a little plain on its own, so I trimmed it down to 4” x 5 1/2” and embossed it using the Typewriter embossing folder for added texture.
The sentiment was stamped onto white cardstock using black ink, then heat embossed using the same clear embossing method as the image. I trimmed the sentiment and matted it with the same matte silver foil cardstock used behind the oval image. This helps the card feel cohesive and visually balanced.
Putting the Thank You Card Together
To keep the design clean and simple, I added foam tape to the back of both the floral panel and the sentiment strip for just a small amount of dimension. The floral oval was placed slightly higher on the dark green embossed panel, which allowed enough space for the sentiment to be centered below.
Once everything was secured in place, the dark green panel was adhered to a white A2 card base. Leaving a thin white frame around the edges really helps pull the entire design together and gives the card a crisp, finished look.
I absolutely love the simplicity and versatility of today’s tulip image. It works beautifully for a wide variety of occasions. I would love to hear how you used yours, so be sure to leave a comment below.
Supplies Used
- Pink and Main Day 4 Tulips Stamp
- White Cardstock
- Dark Green Cardstock
- Matte Silver Foil Cardstock
- Spellbinders Stylish Ovals Dies
- Typewriter Embossing Folder
- Black Alcohol Marker Friendly Ink
- Clear Embossing Ink
- Clear Embossing Powder
- Heat Tool
- Olo Alcohol Markers
- Foam Tape
- White A2 Card Base
- Adhesive
- Die Cutting Machine
Missed a 2025 Advent Project? See below for links
Spellbinders 2025 Advent
- Spellbinders Advent Day 1
- Spellbinders Advent Day 2
- Spellbinders Advent Day 3
- Spellbinders Advent Day 4


Leave a reply to Retro Phone Card | Nostalgic Handmade Card Design – Crafty Cornerstones Cancel reply