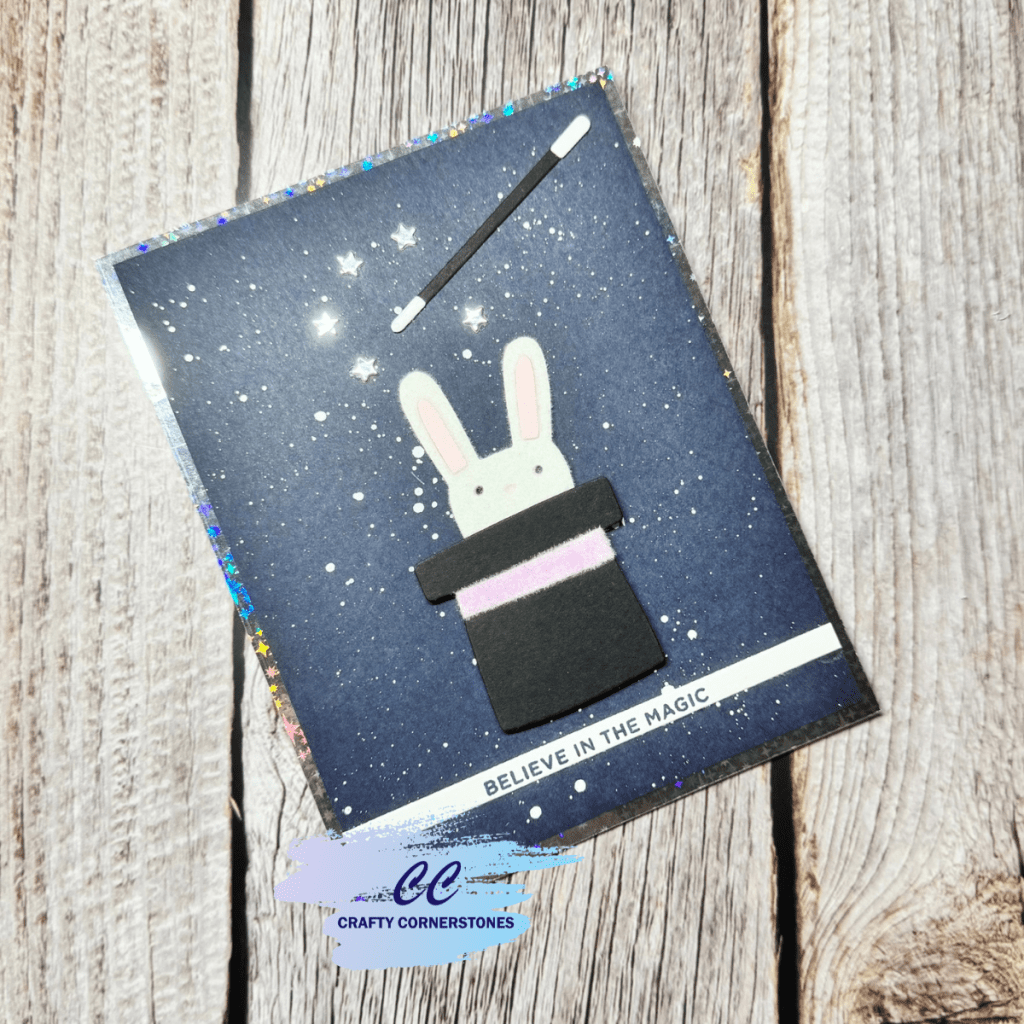
The Spellbinders 2025 Advent Calendar continues to bring the magic, and Day 3 delivered one of the most nostalgic designs so far. Behind today’s door was an adorable bunny peeking out of a magician’s hat. That instantly brought back childhood memories of watching rabbits magically appear from top hats, so of course that became the inspiration for today’s card.
This project came together fairly quickly, but I added a few simple techniques to give it extra texture and shine.
Starry Background for a Magical Scene
I started by creating the background first. I cut a 4” x 5 1/2” panel from Spellbinders indigo cardstock to use as my main background layer. To create the starry sky effect, I splattered Dr. Ph. Martin’s Bleed Proof White Paint across the cardstock and then set it aside to dry completely.
This easy paint splatter technique is one of my favorite ways to add interest and movement to a solid cardstock background.
Adding Fuzzy Texture with Flocking
While the background was drying, I worked on die cutting the bunny and the hat. I wanted the bunny and the hat band to have a soft, fuzzy look, so before die cutting I added double-sided adhesive to the front of the bunny and to the strip that would become the hat band.
To add the texture, I used flocking. If you have ever worked with flocking before, you know it can be messy, much like glitter. To help contain the mess, I use reverse tweezers to gently pick up small amounts of flocking and apply it to the adhesive. Once the backing on the double-sided tape is removed, I gently tap the flocking over the adhesive until it is fully covered.
I used white flocking for the bunny and lavender flocking for the hat band. This method helps keep the flocking under control while still giving a beautiful soft finish.
Die Cutting and Assembly Details
For the inside of the bunny ears and behind the eyes and nose, I used Spellbinders blush cardstock. I cut the hat and the wand from black cardstock scraps. For the ends of the wand, I used white cardstock and added Glossy Accents over the top to give them a shiny, magical look.
I also die cut a few small stars from silver foil cardstock scraps and added them around the wand for just a bit of sparkle.
Sentiment and Final Details
For the sentiment, I chose one from the Spellbinders Mini Christmas Greetings stamp set and stamped it in Concord and 9th Midnight ink to match the indigo background.
As I began assembling the card, I noticed that using blush cardstock behind the bunny created both a pink nose and pink eyes. I wanted black eyes instead, so I took a black glaze pen and carefully colored over the eyes.
Originally, I had planned to layer the indigo panel on a white A2 panel to frame it, but it felt a little flat. I decided to switch it out for a silver foil star-patterned panel instead, and that extra shine really finished the card nicely.
A Card for More Than Just Christmas
This was such a fun card to make, and it could easily be used for more than just Christmas. I can imagine this as a cute birthday card or even a cheerful encouragement card. I will also be using this bunny again for Easter, and I think it would be fun to have it popping out of a hole in the ground for a spring-themed project.
What would you create with this die set? I would love to hear your ideas.
Supplies Used
- Spellbinders 2025 Advent Calendar Day 3 Die Set
- Spellbinders Indigo Cardstock
- Spellbinders Blush Cardstock
- Black Cardstock Scraps
- Silver Foil Cardstock
- Dr. Ph. Martin’s Bleed Proof White Paint
- Double-Sided Adhesive
- White and Lavender Flocking
- Reverse Tweezers
- Glossy Accents
- Spellbinders Mini Christmas Greetings Stamp Set
- Concord and 9th Midnight Ink
- Black Glaze Pen


Leave a reply to Pink and Main Day 6 – A Beautiful Poppy for Any Occasion – Crafty Cornerstones Cancel reply