A Sweet Sunflower Spotlight for Day 2
Welcome back to another day of creative fun with the Pink and Main Advent Calendar. Today’s envelope revealed a beautiful sunflower stamp, and I knew right away it deserved to be front and center in a card design.
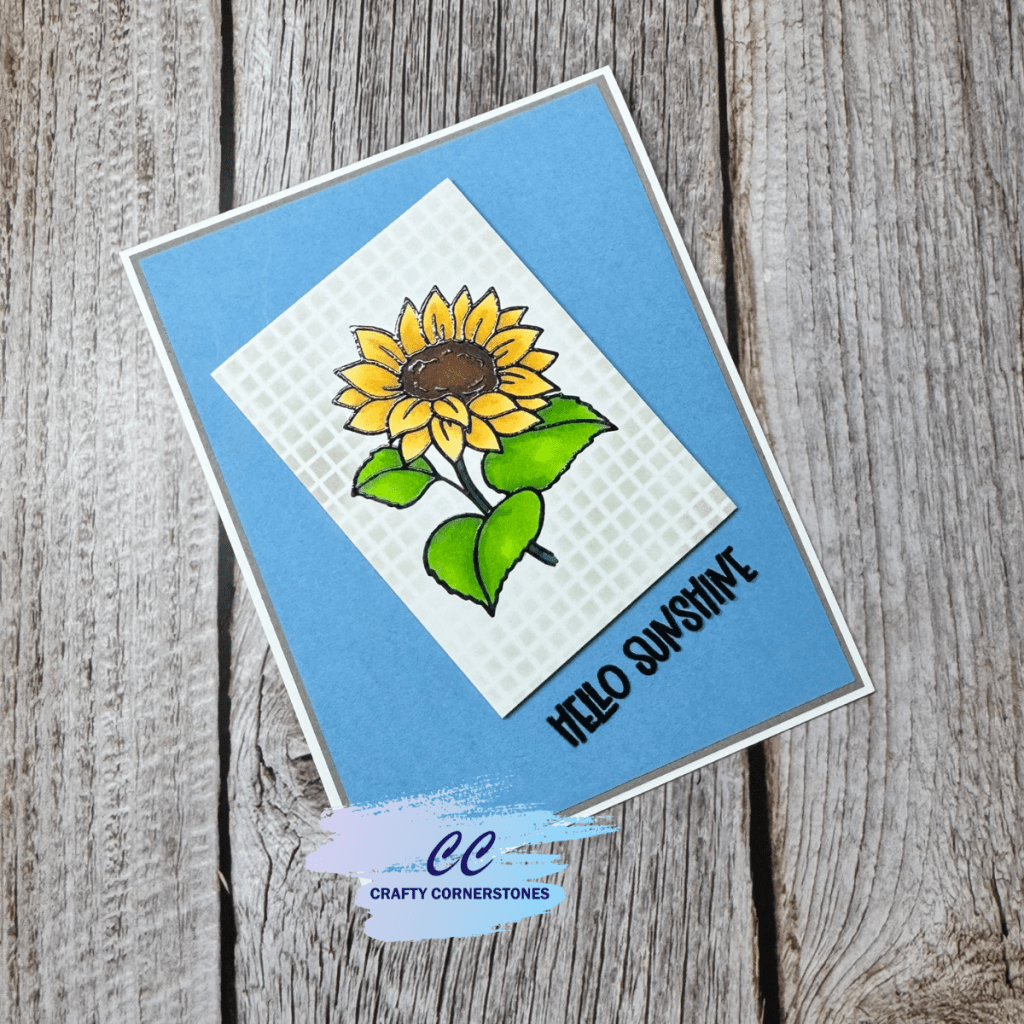
This project is perfect for almost any occasion—hello, thinking of you, get well, encouragement, or even a simple note of kindness. With bold lines and a cheerful sunflower, it shines all on its own.
Creating the Card
Stamping the Sunflower
To begin, I stamped the sunflower on white cardstock using an alcohol-marker-friendly black ink. The Pink and Main stamp already has beautiful bold lines, but for added insurance against smearing, I left the stamp in place in my stamping tool. I stamped again with embossing ink and applied clear embossing powder. This seals the lines beautifully without risking stray flecks from black embossing powder.
Coloring the Image
I colored the image using OLO markers, though any coloring medium you love would be perfect.
Colors used:
• Stems: G1.8, G1.7
• Leaves: YG1.6, YG1.7
• Petals: YO2.5, YO2.3, YO2.2
• Flower center: R1.8, OR3.7
Adding a Soft Background
Since fussy cutting is not my favorite, I knew I wanted to use a rectangle die. Before cutting, the background needed a little something—so I stenciled a soft pattern using the Rectangle Stencil Patterns Stencil from Pink and Main.
Distress Oxide Pumice Stone was the perfect choice to add a subtle halo around the sunflower. After blending, I die-cut the panel with my rectangle die.
Placing the Sentiment
I played with the layout several times before settling on a slightly angled sunflower with the sentiment aligned beneath it. Keeping the sentiment placement parallel to the image helped everything feel cohesive.
Choosing Background Colors
To determine the background layers, I auditioned several cardstock colors. Blue ended up being the perfect complement to the sunflower’s warm tones.
I trimmed:
• Blue cardstock: 4 x 5.25 inches
• Gray cardstock: 4 1/8 x 5 3/8 inches
Layering gray behind the blue pulled in the tones of the Pumice Stone ink and gave the entire design a balanced look.
Final Assembly
Once the layout was confirmed, I stamped the sentiment directly onto the card panel. To avoid any stamping mishaps, I positioned my sunflower panel first (without adhering it), placed my sentiment, then removed the image before stamping.
Next, I added foam tape behind the sunflower panel for dimension and adhered it to the layered background pieces. The entire completed panel was then attached to an A2 card base.
Supplies Used
• Pink and Main Sunflower Stamp (Advent Calendar Day 2)
• White cardstock
• Alcohol-marker-friendly black ink
• Embossing ink
• Clear embossing powder
• OLO Markers
– G 1.8, G 1.7 (stems)
– YG 1.6, YG 1.7 (leaves)
– YO 2.5, YO 2.3, YO 2.2 (petals)
– R 1.8, OR 3.7 (flower center)
• Pink and Main Rectangle Stencil Patterns
• Distress Oxide Pumice Stone ink
• Ink blending tools
• Rectangle die
• Blue cardstock (4 x 5.25 inches)
• Gray cardstock (4 1/8 x 5 3/8 inches)
• A2 card base
• Foam tape
• Stamp positioning tool
A Sunflower to Brighten Your Day
I hope today’s sunflower card brought a little sunshine to your day. I’d love to hear what you’ve been creating during Advent—share your thoughts in the comments below.


Leave a reply to Create Stunning Foiled Tags with Pink and Main – Crafty Cornerstones Cancel reply