Tis the Season for Crafty Advent Calendars
‘Tis the season for crafty advent calendars, and I could not be more excited. Opening a tiny gift each morning sparks creativity in such a fun and inspiring way. This year I am working with three Advent calendars and sharing daily projects from Spellbinders, Pink and Main, and Gina K. Designs.
If you discover something you love, I would truly appreciate the use of my affiliate links. Your support helps keep Crafty Cornerstones thriving at no additional cost to you.
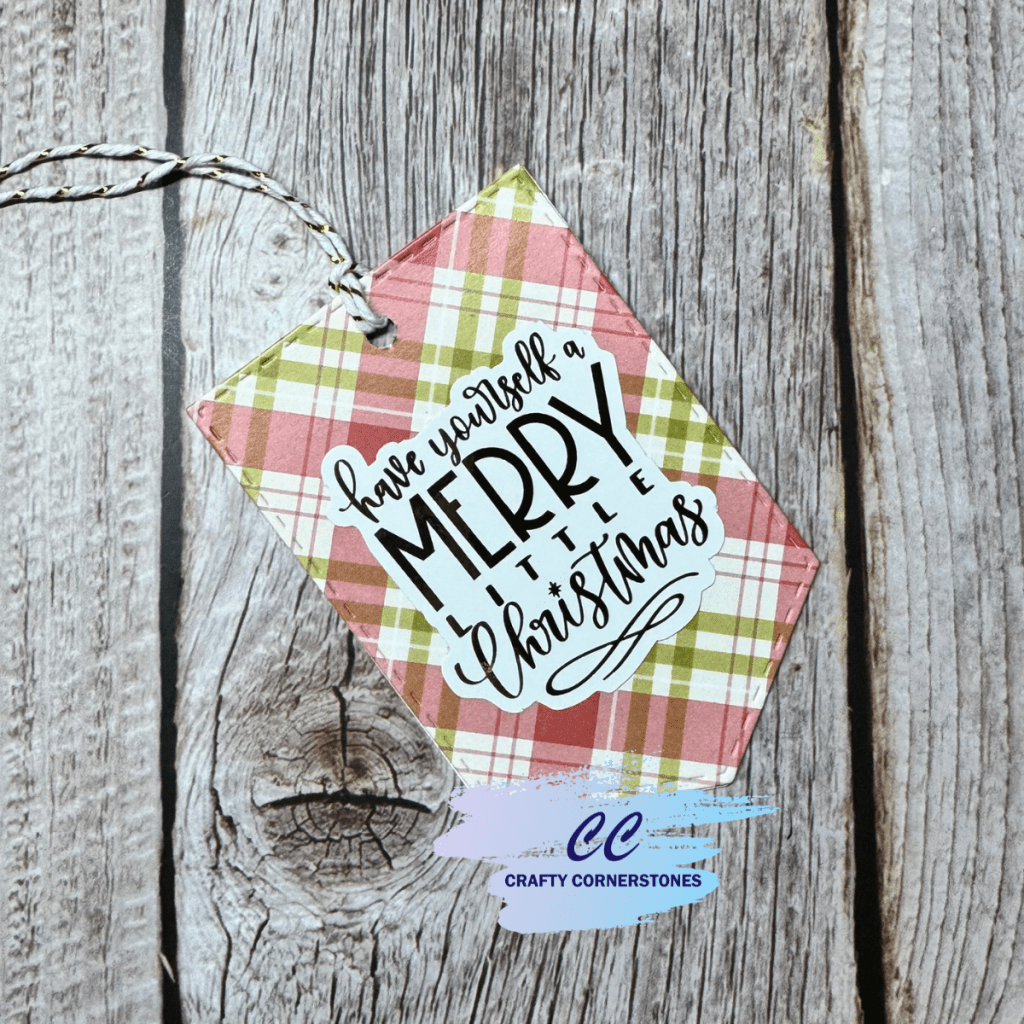
Quick Christmas Tag Using Pink and Main Advent Day 1
For Day 1 of the Pink and Main 2025 Advent Calendar, we received a set of fun patterned papers. You could take these papers in so many creative directions, but since I had just come upstairs from wrapping Christmas gifts, gift tags were top of mind.
Patterned paper is ideal for quick and easy tags, and this one came together faster than expected.
Supplies Used
- Pink and Main Advent Day 1 Patterned Papers (Advent Calendar is sold out, other pattern paper options here)
- Pink and Main Hand Lettered Holiday Greetings – Foilable Cut Ups
- Gold Cheer Foil
- Nesting Flag Die (from the Joyful Holiday Event) Other Options
- Mini Minc Machine
Creating the Tag
1. Preparing the Tag Base
I selected my favorite piece of patterned paper from the advent calendar and cut the base of the tag using the Nesting Flag Dies. I repeated this with white cardstock to create a sturdy front and back for the tag.
2. Adding the Foiled Sentiment
For the sentiment, I reached into my stash of Foilable Cut Ups. If you have never used these before, they are a must-have. They come pre-printed and pre-cut, ready to use as is or ready for foiling if you want to elevate your project.
I chose gold foil for this design. Using the Mini Minc set to heat level 3, I cut a piece of foil to fully cover the toner print on the sentiment. After placing the sentiment and foil into the carrier sheet, I ran it through the machine. Once cooled, I peeled the foil back to reveal a stunning metallic finish.
Tip: Save the negative foil piece. It can be used on toner sheets to create a reverse sentiment. Pink and Main has several helpful tutorials on their YouTube channel if you want to see the process in action.
3. Assembling the Tag
The assembly was simple. I adhered the patterned paper layer and the white cardstock layer together. Then I added the foiled sentiment to the patterned side of the tag. A small hole punch created the opening for my tag string, and just like that, the project was complete.
A quick, clean, elegant tag ready for holiday gifting.
Do you like to create handmade tags for your holiday gifts?
Share your favorite styles or ideas in the comments. I always enjoy hearing what inspires other makers.


Leave a reply to Holiday Snowman Tag – Spellbinders Advent Day 6 – Crafty Cornerstones Cancel reply