Exploring the Versatility of the Spellbinders Regal Reflections Collection with Three Distinct Card Designs
Regal Reflections Collection | Spellbinders
I am absolutely loving the new Regal Reflections Collection from Spellbinders. If you attended the recent Scrapbook and Cards Today Crop & Create, this collection may already look familiar to you. (But keep reading because there are some add-ons to the collection!)
To really showcase just how versatile this collection is, I decided to create three very different cards, each with a completely unique theme and feel. From elegant florals to a regal focal image and even a wedding card, this collection truly does it all.
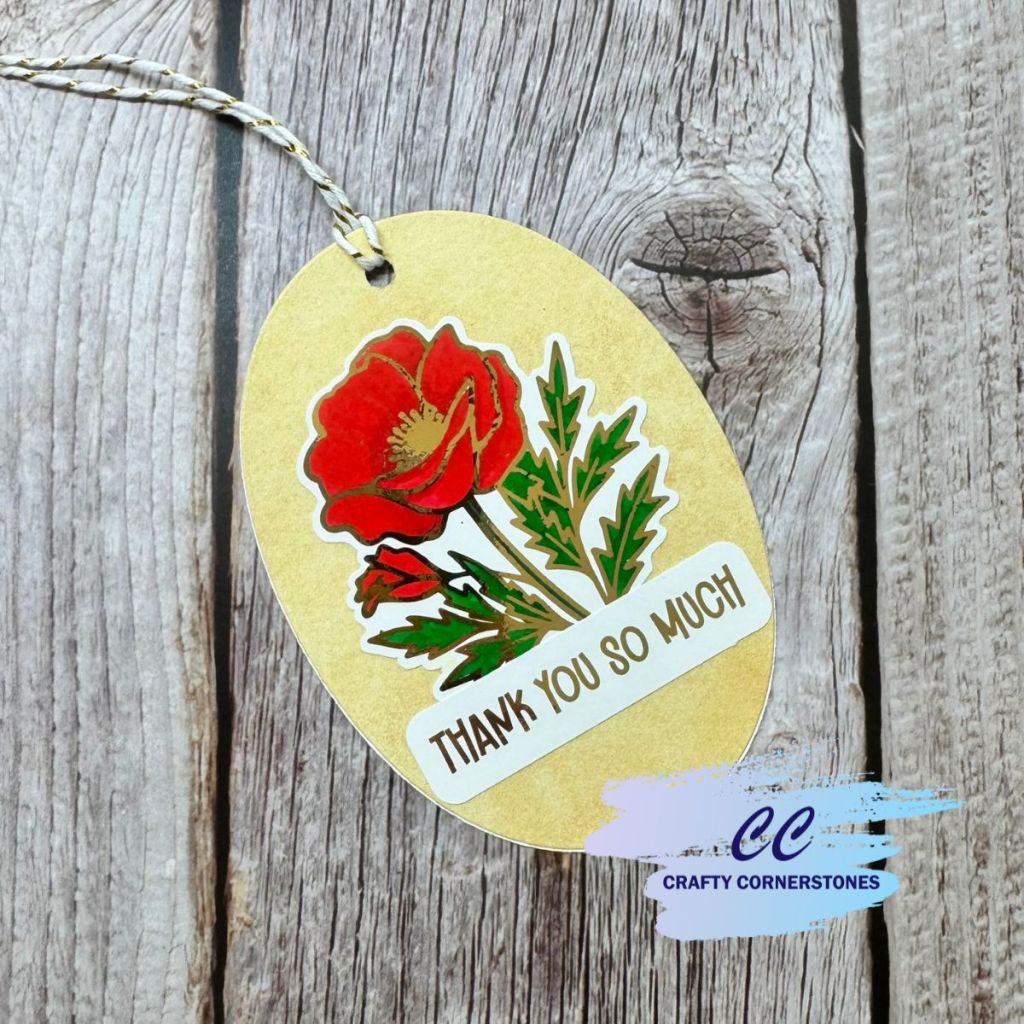
Card One | Elegant Thank You Card
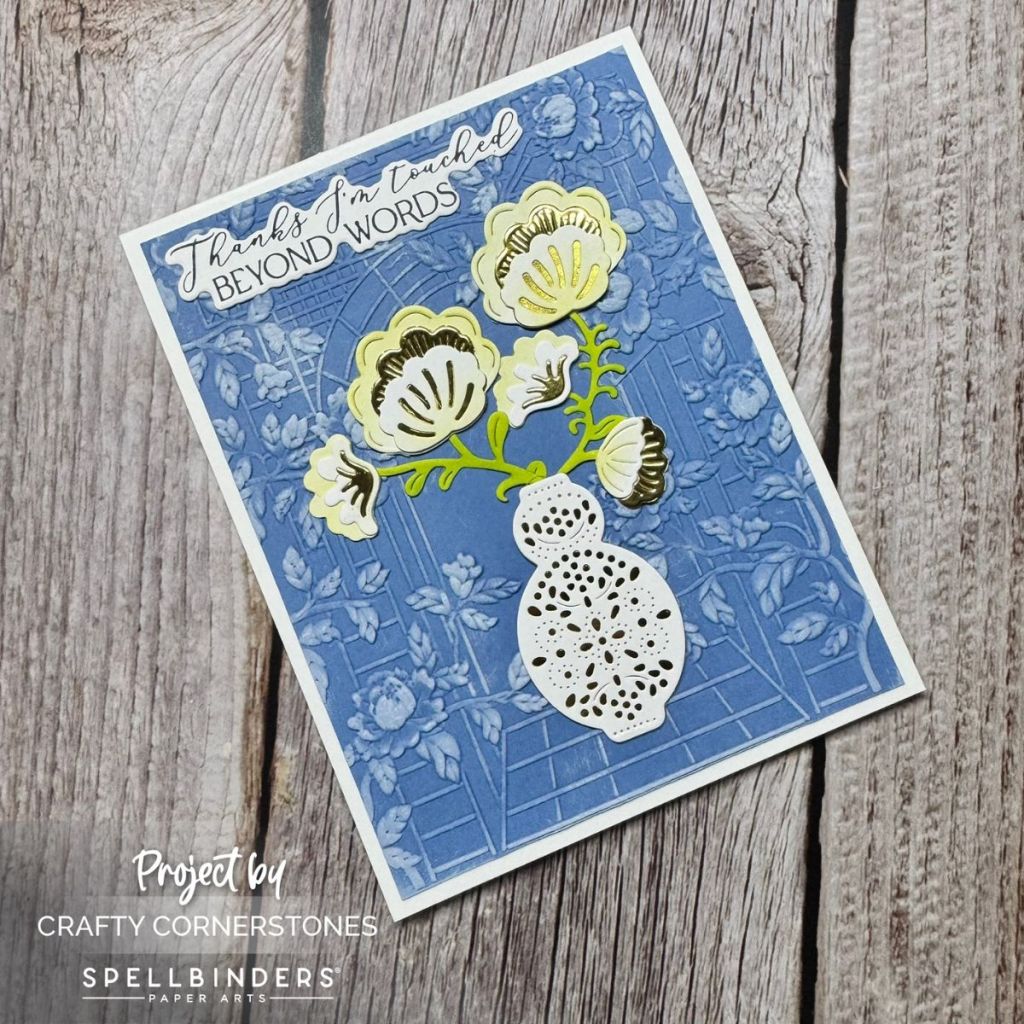
For my first card, I created a Thank You card featuring the Regal Lattice 3D Embossing Folder and the Regal Blooms set.
Creating the Florals
I die-cut the flowers using Gold Mirror Metallic Cardstock from the Gold Treasured Cardstock Pack along with Classic White ColorWheel Cardstock. After laying out the pieces, I felt the white and gold combination was a bit flat, so I added soft yellow highlights using whatever yellow ink was already on my blending brush.
For the stems, I used my “dirty” green ink brush to lightly add color. Once everything was colored, I assembled the flowers and vase and set them aside for later.
Background and Sentiment
For the background, I embossed a 4″ x 5.25″ panel of Celestial ColorWheel Cardstock using one side of the Regal Lattice 3D Embossing Folder. To enhance the texture, I lightly swiped the raised areas with Hero Arts Unicorn Pigment Ink.
While the pigment ink dried, I created the sentiment using the You Are Everything Press Plate and Die Set with the BetterPress System and BetterPress Black Ink on BetterPress Cotton Paper.
Assembly
Once all the pieces were ready, I arranged the florals and vase, then used Press’n Seal to pick everything up so I could add liquid adhesive to the back. I flipped it into place, added a glass block to ensure good adhesion, and removed the Press’n Seal once dry.
The sentiment was added to the top left, and the entire panel was adhered to an A2 card base. I absolutely love how this card turned out.
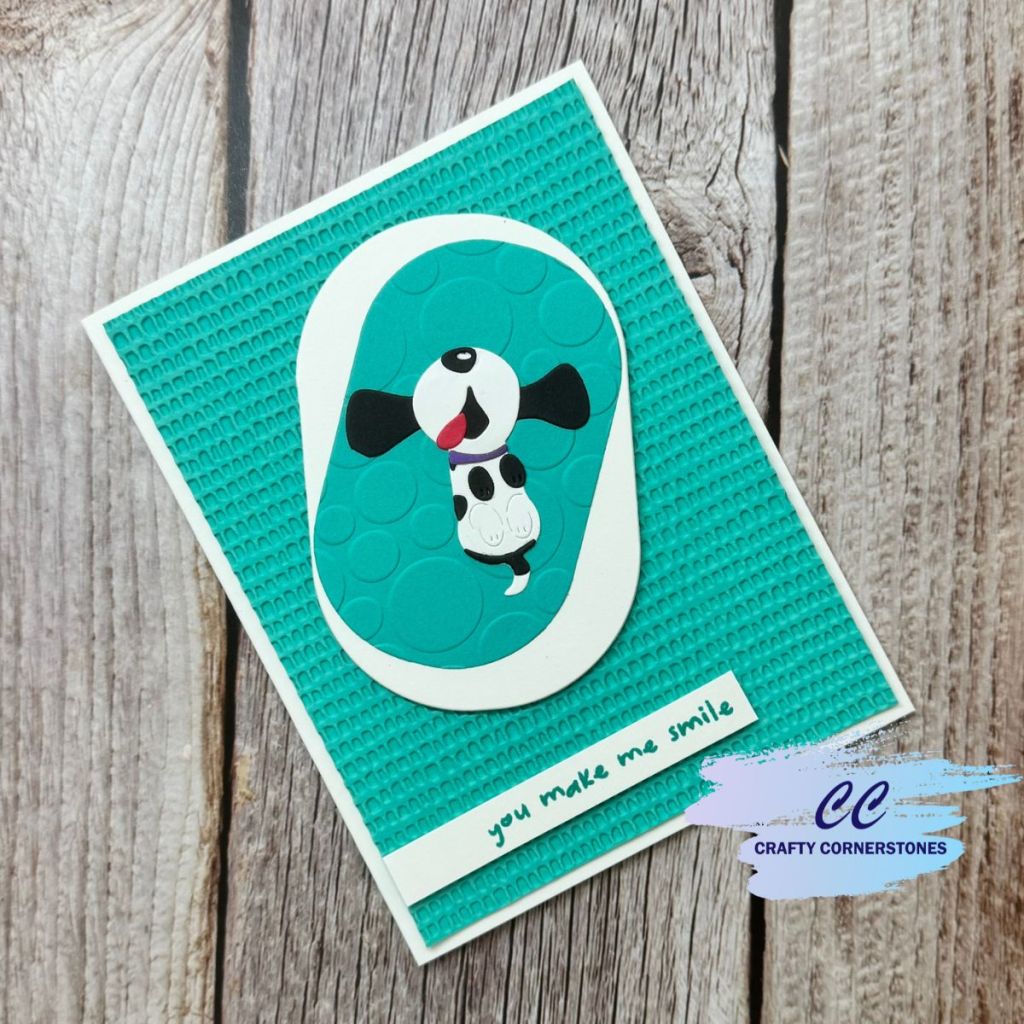
Card Two | Regal Pair Statement Card
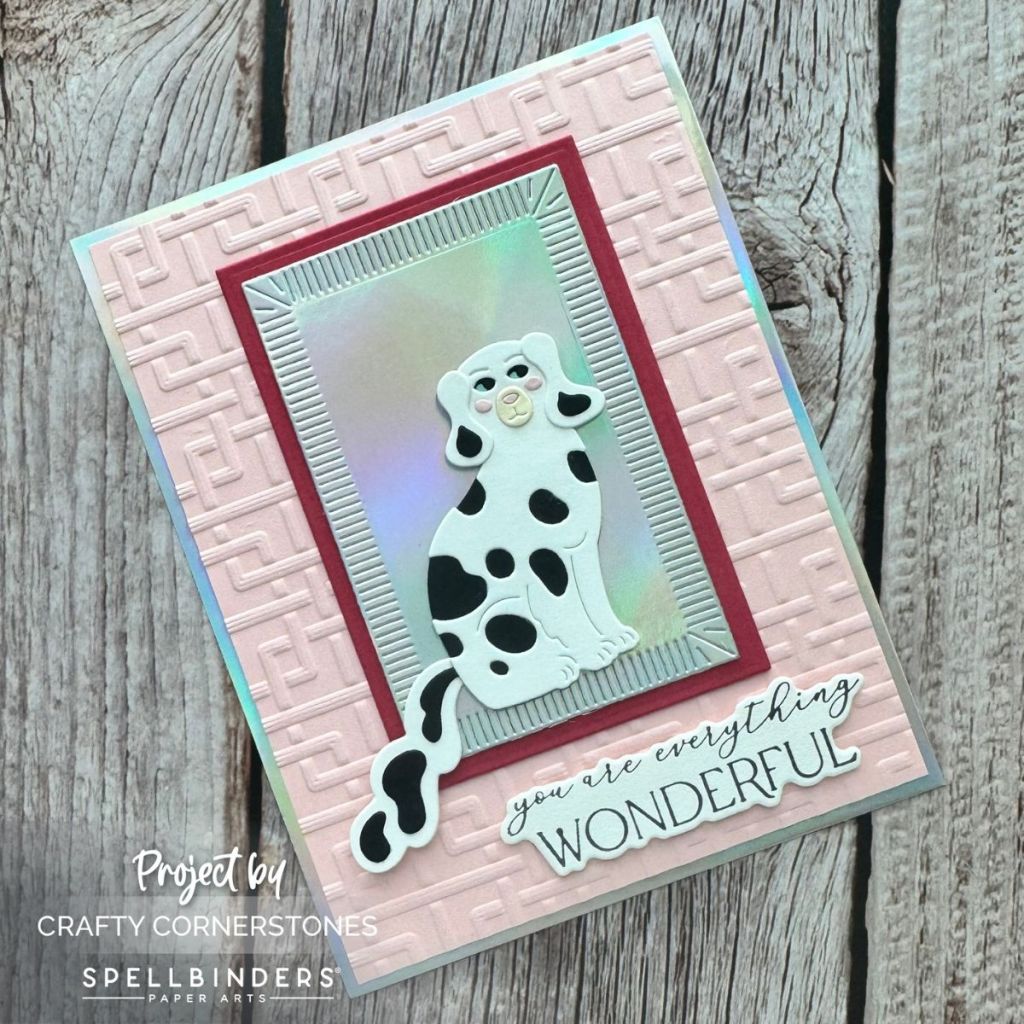
For my second card, I featured the Regal Pair along with the opposite side of the Regal Lattice 3D Embossing Folder.
Focal Image and Layers
I chose to use just one of the dogs from the Regal Pair set, cutting and assembling all the pieces before setting it aside.
The main panel was cut from Blush ColorWheel Cardstock to 4″ x 5.25″ and embossed with the Regal Lattice folder. Using the Linear Touch Rectangles and Tag Etched Die Set, I cut a solid rectangle from Wild Berry ColorWheel Cardstock and a smaller etched rectangle from silver metallic cardstock.
Sentiment and Assembly
The sentiment was created using the BetterPress System and the You Are Everything Press Plate and Die Set, then die cut with the coordinating dies.
For final assembly, I layered everything onto a 4.25″ x 5.5″ silver metallic base panel. The dog was centered on the etched silver panel. Since the tail extends beyond the layered panels, I added a small piece of foam tape to the tip of the tail for balance.
The sentiment was popped up with foam tape and tucked neatly beneath the dog image.
Card Three | Elegant Wedding Card
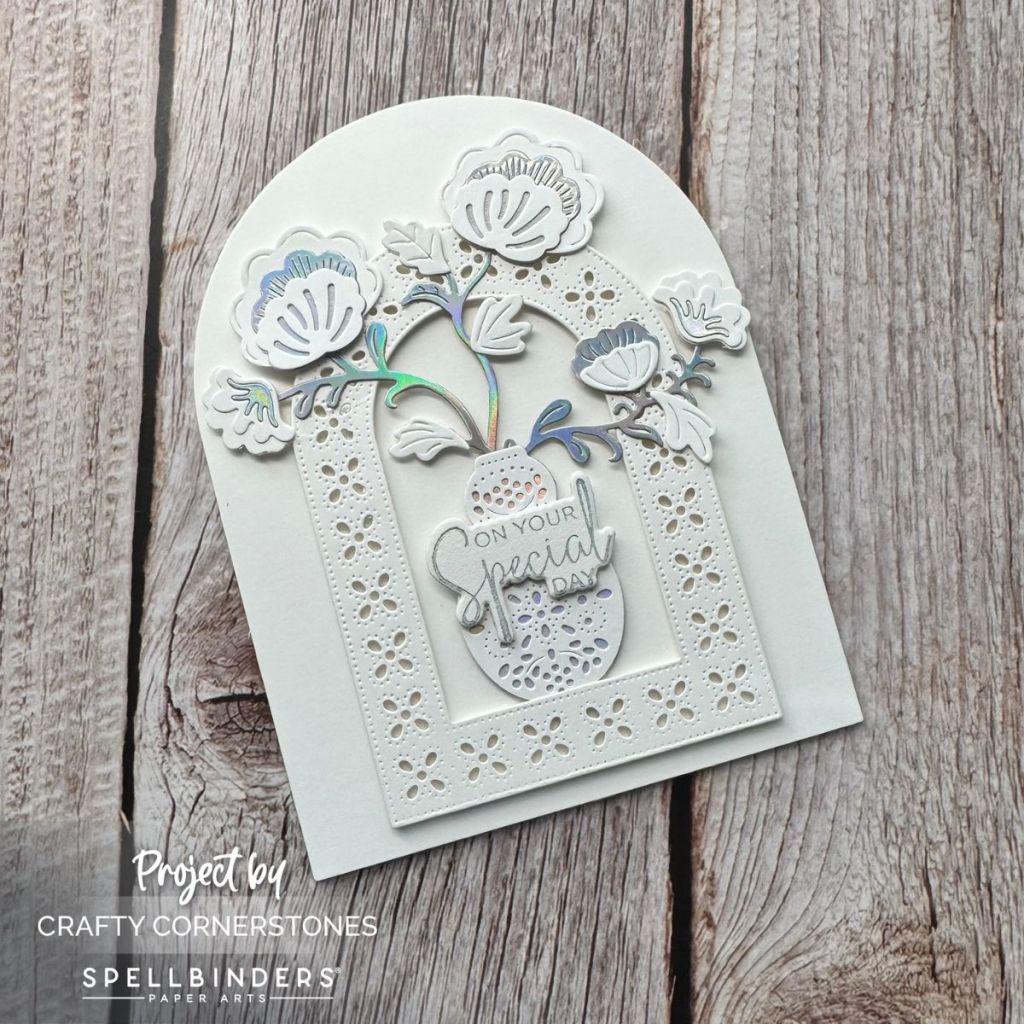
For my third project, I took the collection in a completely different direction and created a wedding card. This one pushed me outside my comfort zone, and I loved every minute of it.
Florals and Vase
I started with the Regal Blooms again. My first attempt using only white cardstock felt a bit lackluster, so I re-cut everything in both silver and white cardstock and mixed them together.
The vase base was cut in silver with a white decorative overlay to allow hints of silver to peek through. The stems were cut from silver cardstock and the leaves from white. Mixing the silver and white florals created a stunning, elegant effect.
Shaped Card Base
To frame the florals, I used the small arch from the Arch Punch and Pierce Plate Etched Dies, cutting it from white cardstock.
For the shaped card base, I used the largest die from the Essential Arches Etched Die Set. I die-cut the front panel normally, then created the card base by allowing the folded edge to hang slightly outside the cutting plate. This created a hinged shaped card with a clean finished look.
Final Assembly and Sentiment
I assembled the florals using the same Press’n Seal method as Card One, this time adding foam tape behind the vase to hold the stems in place.
The arch panel was popped up with 1/8″ foam tape, carefully avoiding the pierced holes. The floral arrangement was gently slid behind the arch, then pulled forward so the flowers sat on top. Liquid adhesive secured everything in place.
For the sentiment, I used the BetterPress System and the A Little Message Sentiments Press and Die Set, inking the plate with Lisa Horton Silver Shine Metallic Pigment Ink. After die cutting the sentiment, I added thin foam tape and adhered it to the vase to complete the card.
Final Thoughts
Creating three very different cards with the Regal Reflections Collection really reminded me how versatile this collection is. From everyday elegance to statement designs and even wedding cards, this collection truly stretches your supplies and creative possibilities.
Let’s Chat
Which of these three card styles is your favorite, and what occasion would you use the Regal Reflections Collection for first?
Supply List
- Spellbinders Regal Reflections Collection
- Regal Blooms Dies
- Regal Pair Dies
- Regal Lattice 3D Embossing Folder
- Arch Punch and Pierce Plate Etched Dies
- Essential Arches Etched Die Set
- Linear Touch Rectangles and Tag Etched Die Set
- You Are Everything Press Plate and Die Set
- A Little Message Sentiments Press Plate and Die Set
- Spellbinders BetterPress System
- BetterPress Black Ink (Regal Tones Collection)
- Lisa Horton Silver Shine Metallic Pigment Ink (Metallic Collection of 3)
- Alternate – Titanium
- Hero Arts Unicorn Pigment Ink
- Spellbinders ColorWheel Cardstock (Classic White, Celestial, Blush, Wild Berry)
- Gold Mirror Metallic Cardstock (Gold Treasured Pack)
- Silver Metallic Cardstock (Silver Treasured Pack)
- BetterPress Cotton Paper
- Foam Tape (standard and thin)
- Liquid Adhesive
- Press and Seal
Thank you so much for stopping by Crafty Cornerstones. Be sure to subscribe so you don’t miss future projects. Using my affiliate links is never an extra cost to you and helps me continue sharing crafty inspiration. I’d also love to hear from you—leave a comment below and let me know what you’re creating.


Leave a comment