Pink and Main Day 12 Stamp: Simple Floral Cardmaking, Peony and Sending Love Sentiment
Today’s surprise from the Pink and Main Advent Calendar was a beautiful peony stamp paired with the sentiment Sending Love. I am absolutely loving all of these classic floral stamps. They are timeless, versatile, and perfect for a wide variety of card styles.
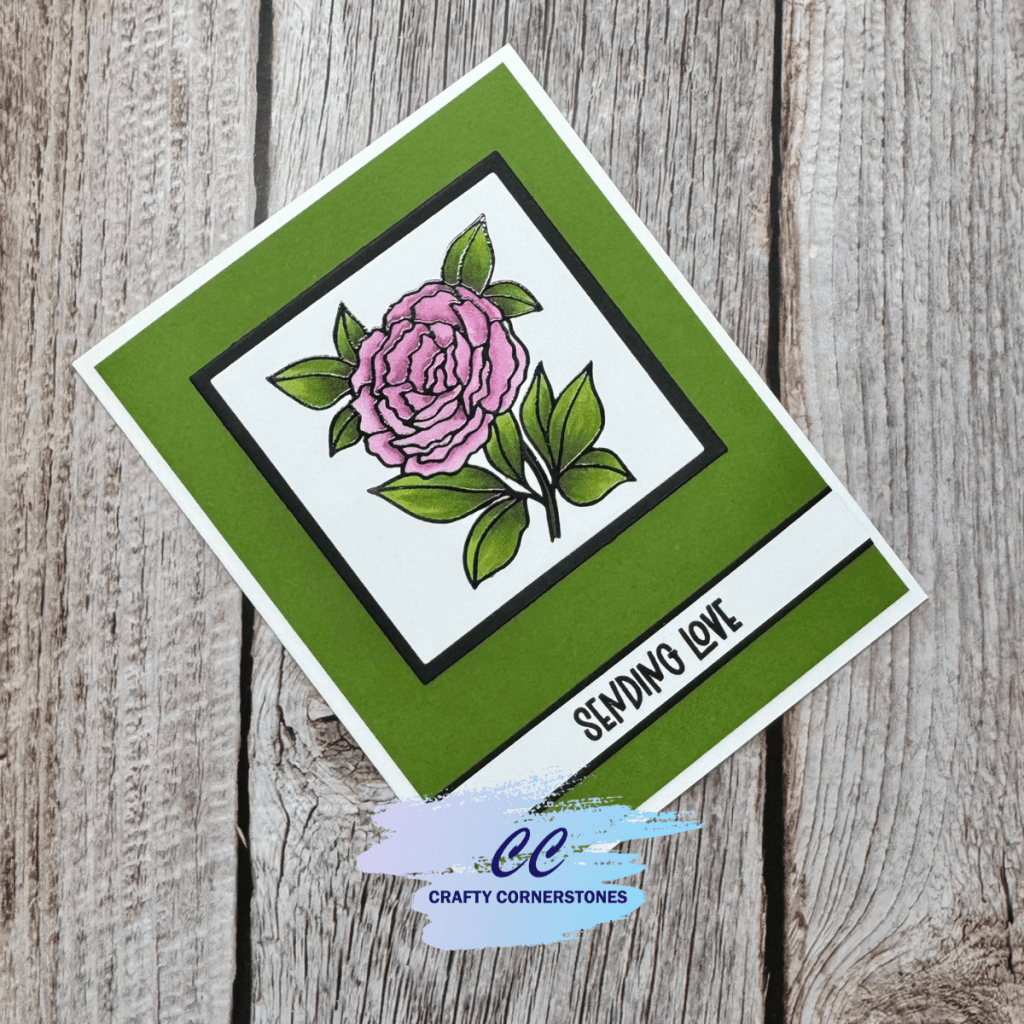
For today’s project, I created a simple “Sending Love” card with a clean and classically elegant design. This is the kind of card that works for so many occasions and comes together beautifully without a lot of extra layers or embellishments.
Stamping the Peony Image
For the main floral image and sentiment, I stamped everything onto white cardstock using black ink and clear embossing powder. This is my go-to method, especially when I know I will be using alcohol markers.
Clear embossing powder gives the stamped image a subtle raised finish while protecting the lines from smearing. I also prefer clear embossing powder over black because it eliminates the stray black flecks that sometimes appear with black embossing powder.
Coloring with Alcohol Markers
I colored the peony using Altenew alcohol markers, which have quickly become a favorite in my craft room. They blend beautifully, and the color range works well alongside markers from other brands.
Marker colors used:
- Peony petals: R535, R602
- Leaves: G743, G735, G713
I kept the coloring soft and controlled to maintain the clean and elegant feel of the card.
Creating the Focal Panel and Sentiment Strip
To keep everything balanced and uncluttered, I trimmed the floral image down to a 2 ¾” x 2 ¾” square. I then added a black mat cut to 3” x 3” to frame the image.
For the sentiment, I trimmed it into a long strip measuring approximately 7/16” wide by 5.25” long. I also cut a black backer slightly wider, about ¾”, so the black matting would peek out at the top and bottom. These layers were adhered together and set aside for final assembly.
Final Card Assembly
I love a framed-edge look, so I selected a coordinating green cardstock from my stash to create the main panel. Before adhering this panel to the card base, I attached both the floral square and the sentiment strip.
At this point, I decided the sentiment looked better aligned with the width of the green panel rather than stretching across the entire card front. I trimmed the sentiment strip so it lined up perfectly with the edge of the panel.
Once everything was positioned, I adhered the green panel to the card base, leaving even borders all the way around. With that final step, the card was complete.
Final Thoughts
I enjoy making all kinds of cards, but sometimes a clean and simple design is exactly what I need. Cards like this are timeless, easy to replicate, and perfect to have on hand for many occasions.
What kind of cards do you find yourself making most often?
Are you enjoying the Pink and Main Advent Calendar as much as I am? Have you thought about signing up for the upcoming Pink and Main Birthday Bash? It is going to be EPIC! I mean just look at that instructor line up in the graphic below!
DO NOT WAIT SIGN UP TODAY


EVENT KITS WILL NOT SHIP UNTIL CLOSER TO THE EVENT – PLEASE DO NOT ADD OTHER ITEMS TO YOUR PURCHASE!
REMINDER! If you’re signing up for the Birthday Bash Virtual Event, the kit will not ship for a few months! If you add anything else to your order, it will be delayed until the kits ship!
Missed a 2025 Advent Project? Links Below
Spellbinders 2025 Advent
- Spellbinders Advent Day 1
- Spellbinders Advent Day 2
- Spellbinders Advent Day 3
- Spellbinders Advent Day 4
- Spellbinders Advent Day 5
- Spellbinders Advent Day 6
- Spellbinders Advent Day 7
- Spellbinders Advent Day 8
- Spellbinders Advent Day 9
- Spellbinders Advent Day 10
- Spellbinders Advent Day 11
- Spellbinders Advent Day 12
Pink and Main 2025 Advent
- Pink and Main Day 1
- Pink and Main Day 2
- Pink and Main Day 4
- Pink and Main Day 5
- Pink and Main Day 6
- Pink and Main Day 7
- Pink and Main Day 8
- Pink and Main Day 9
- Pink and Main Day 10
- Pink and Main Day 11
Thank you so much for stopping by Crafty Cornerstones. Be sure to subscribe so you don’t miss future projects. Using my affiliate links is never an extra cost to you and helps me continue sharing crafty inspiration. I’d also love to hear from you—leave a comment below and let me know what you’re creating.
Supply List
- Pink and Main Day 12 Peony Stamp (Sold Out)
- Alternate – Pretty Peony
- Ice Rink Cardstock
- Asphalt Cardstock
- Coordinating Green Cardstock
- Alternate – Whispering Woodland Cardstock Bundle
- Black Ink
- Clear Embossing Powder
- Heat Tool
- Altenew Alcohol Markers
- Firewood Garden Set
- R535, R602
- G743, G735, G713
- Firewood Garden Set
- Layered Squares Dies
- Paper Trimmer
- Adhesive


Leave a comment