Creating coordinated paper crafting projects is one of my favorite ways to stretch supplies and create cohesive, meaningful gifts. Today’s project was inspired by a challenge from Gina K Designs to create a card and tag using the same supplies, paired with the soft, dreamy inspiration from Jaycee Jasper’s YouTube video, Will I FINISH 4 CARDS? The gentle colors and Emboss Resist technique he used motivated me to create a simple yet elegant duo perfect for any occasion.
In this tutorial, I am sharing how I created both the card and matching tag using the Emboss Resist technique, some soft ink blending, and one beautiful floral stamp set. This project is beginner-friendly yet offers results that feel polished and artistic.
What Is the Emboss Resist Technique?
The Emboss Resist technique involves heat embossing an image, then blending ink over it. The embossed areas resist the ink and stay bright, leaving a crisp design that pops against your blended background.
It’s an easy but striking technique that adds depth and softness to your projects.
Supplies Used
- Handpicked Flowers Stamp and Die Set by Gina K
- Applemint Ink – Gina K Designs
- Sea Glass Ink – Gina K Designs
- Clear embossing ink
- Clear embossing powder
- Master Layouts 2 Dies – Gina K Designs
- Heat tool
- Blending brushes
- Cardstock in white and black
Emboss Resist: Step-by-Step Tutorial
1. Stamp Your Design
Stamp the floral image from the Handpicked Flowers set using a watermark or embossing ink.
2. Apply Embossing Powder
Cover the stamped image with clear embossing powder and tap off the excess.
3. Heat Emboss
Melt the powder using a heat tool until it becomes shiny and raised.
4. Add Ink
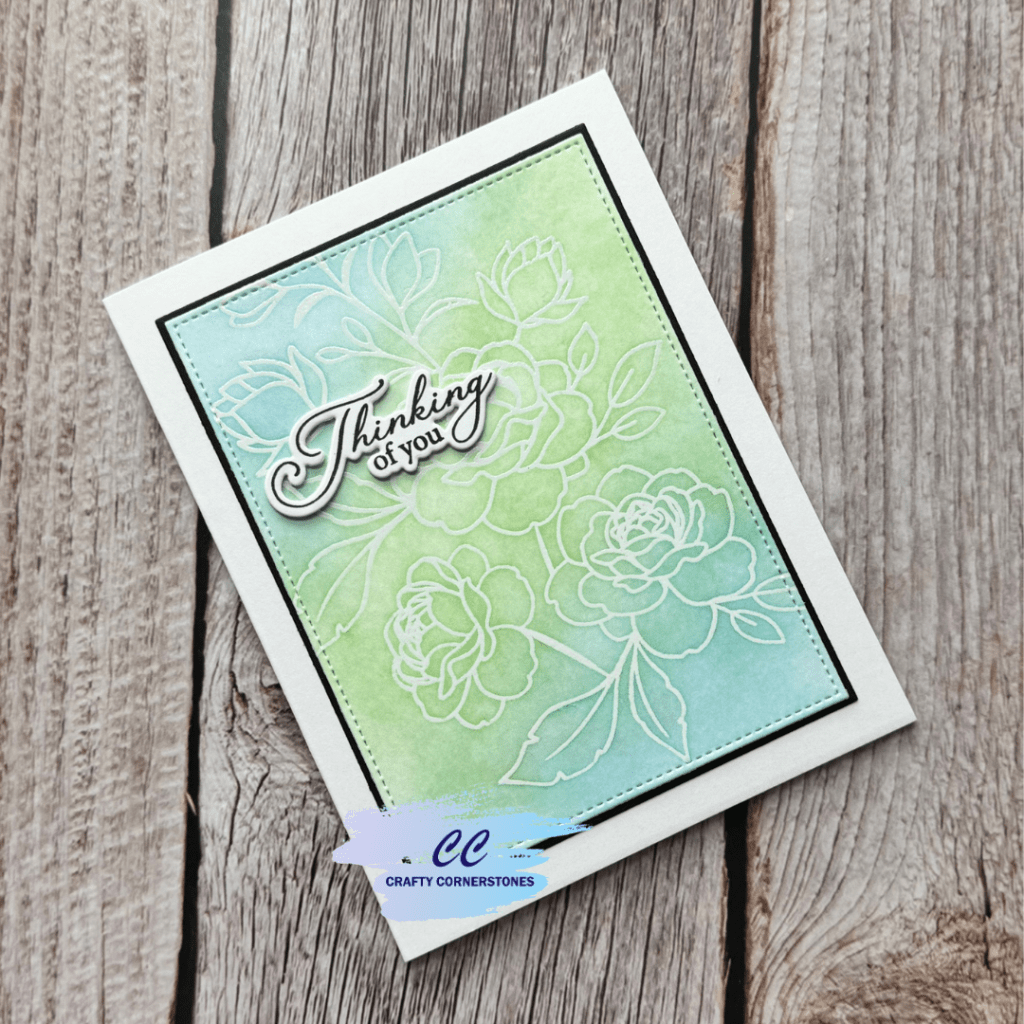
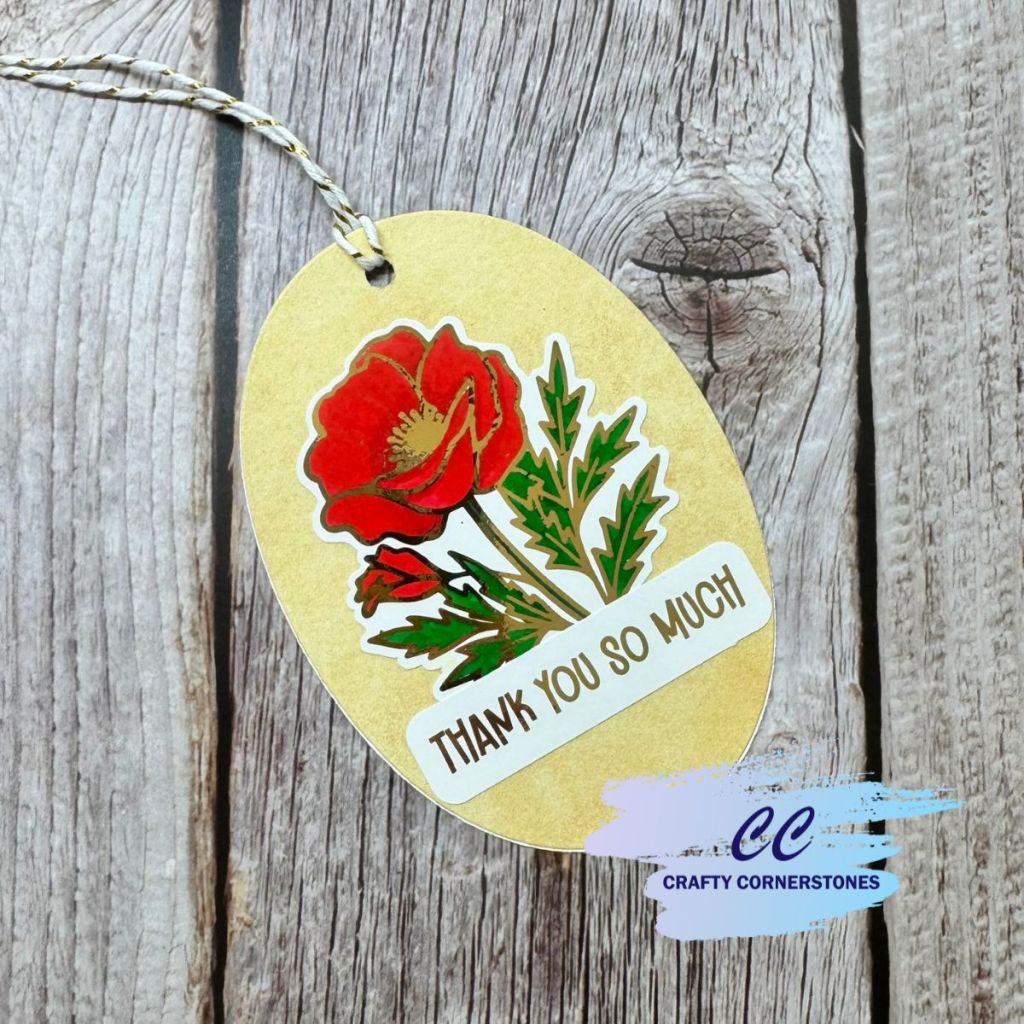
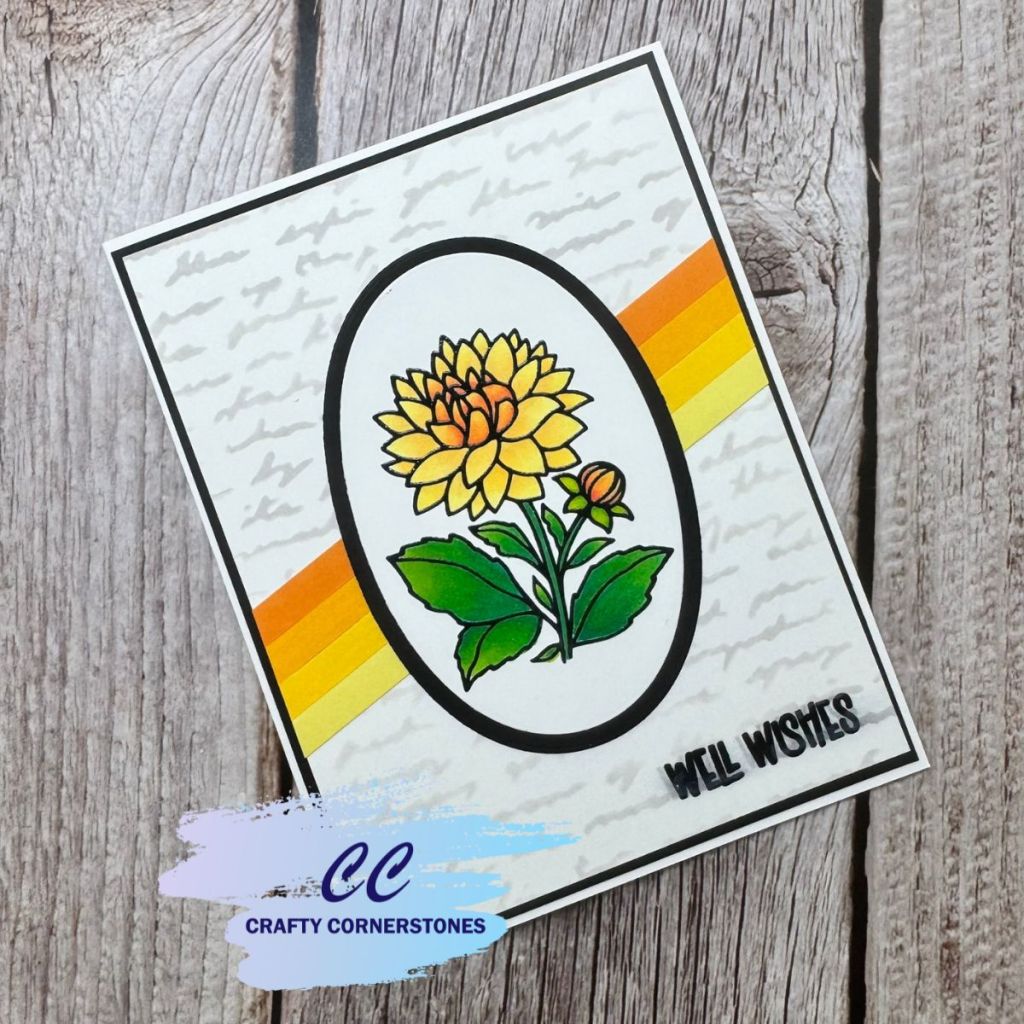
Blend Applemint and Sea Glass ink across the background at an angle. I placed Sea Glass in two corners and Applemint through the center for a soft, airy look. These colors blend beautifully together.
5. Reveal the Design
Gently wipe the embossed areas with a dry tissue to remove any ink residue. Your floral image will now appear crisp and glowing against the blended background.
Tips for Beautiful Emboss Resist Results
- Allow the embossing to cool before ink blending to avoid smudging.
- Experiment with clear, white, or metallic embossing powders.
- If ink pools on the embossing, buff lightly with a dry cloth.
Creating the Card and Matching Tag
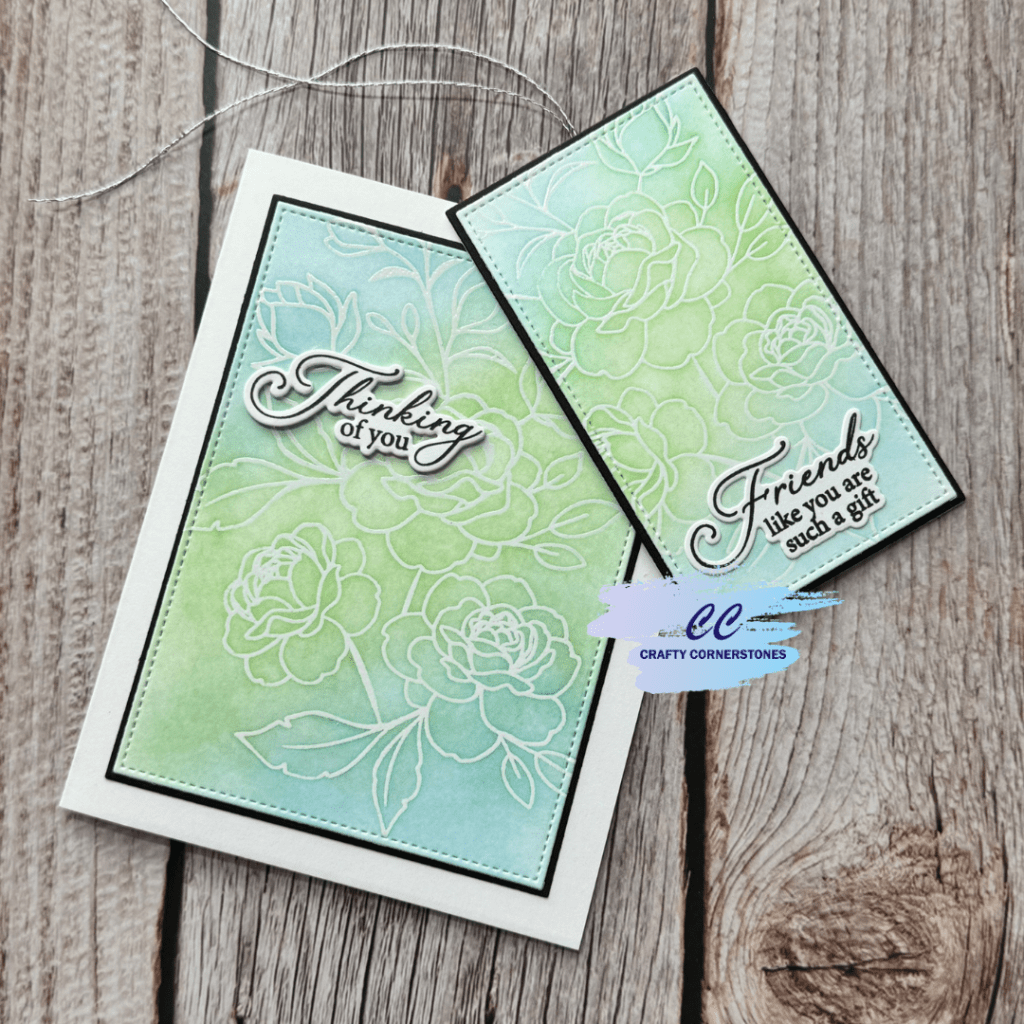
With both backgrounds complete, I used Master Layouts 2 to trim them down. The dashed rectangle dies were perfect for selecting the exact areas I wanted to feature.
Each embossed panel was layered onto black cardstock using the coordinating layering dies in the set.
Cut one extra panel in the with the smaller coordinating layering die in white for the back of the tag.
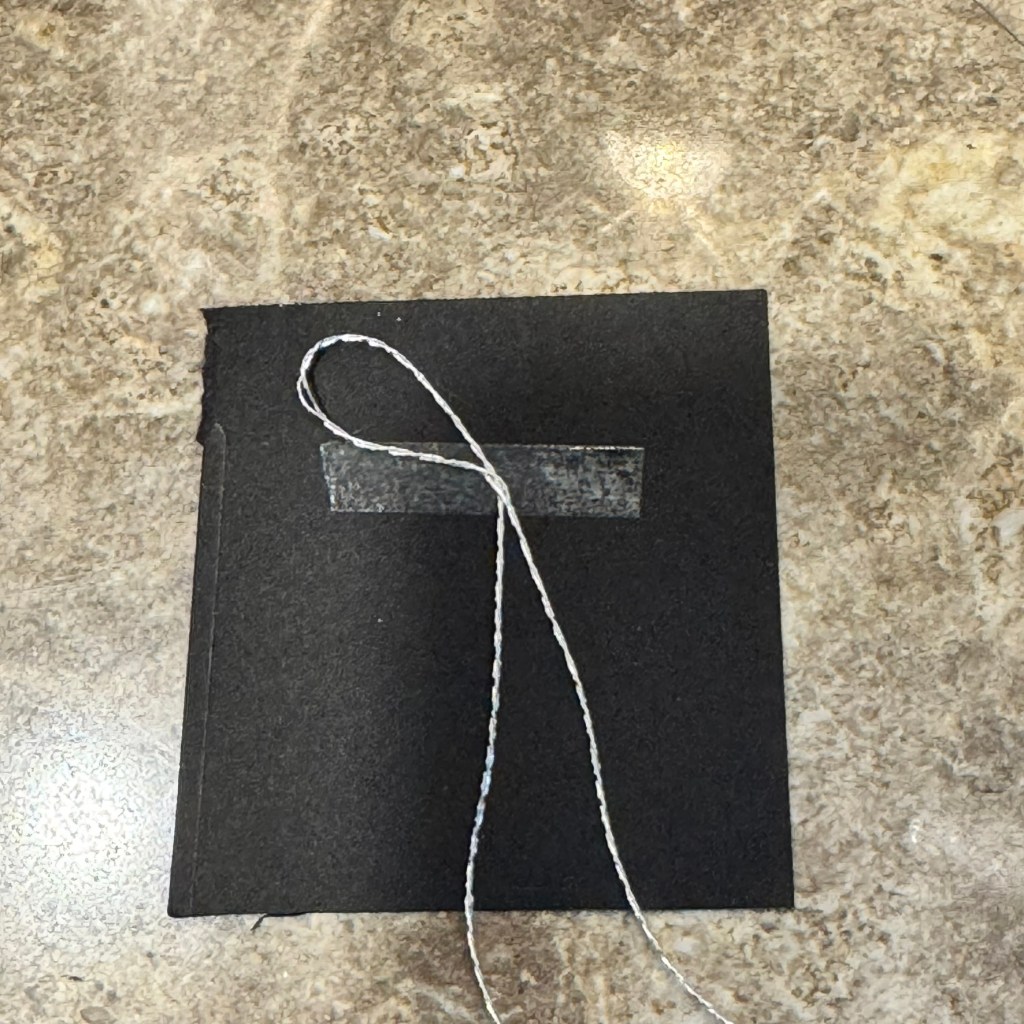
Adding the Tag String Without Punching a Hole
Because the background was too beautiful to punch through, I used this method to secure the string between layers:
- Apply a strip of double-sided tape near the top on the back side of the black cardstock.
- Place the string upside down so the tag tie hangs downward.
- Add a second piece of tape below the first, then fold the string up over it.
- Adhere the white backing panel over the black panel, sandwiching the string securely.
This prevents the string from slipping and keeps the tag clean and elegant.


Finishing Touches
To complete the projects, I stamped and die cut two sentiments from the Handpicked Flowers stamp set and added one to each piece. The simplicity of the design allows the emboss resist background to shine.
Creative Uses and Variations
If you’re ready to explore beyond this project, here are some fun ways to use the Emboss Resist technique:
- Backgrounds: Florals, snowflakes, geometric patterns, or script stamps.
- Focal Images: Emboss the main motif and create a glowing halo of color.
- Layered Color Blends: Try sunset, galaxy, or ombré effects.
- Seasonal Projects: White embossing with deep blues creates a frosty winter look.
What will you try next? Share your ideas in the comments.


Leave a comment