Today I’m switching gears from Christmas in July to my all-time favorite holiday—Halloween! I’m not entirely sure what it is about Halloween that captures my heart. Maybe it’s the crisp fall air, the playful costumes, or the quirky decorations. Whatever it is, this time of year just makes me happy.
The first decision was the spider web. I tested several papers—vellum (which would have shown the foam tape without a frame), white (too flat), and gray (too dull). In the end, matte silver cardstock was the winner. It offered the perfect subtle shine without being overpowering.
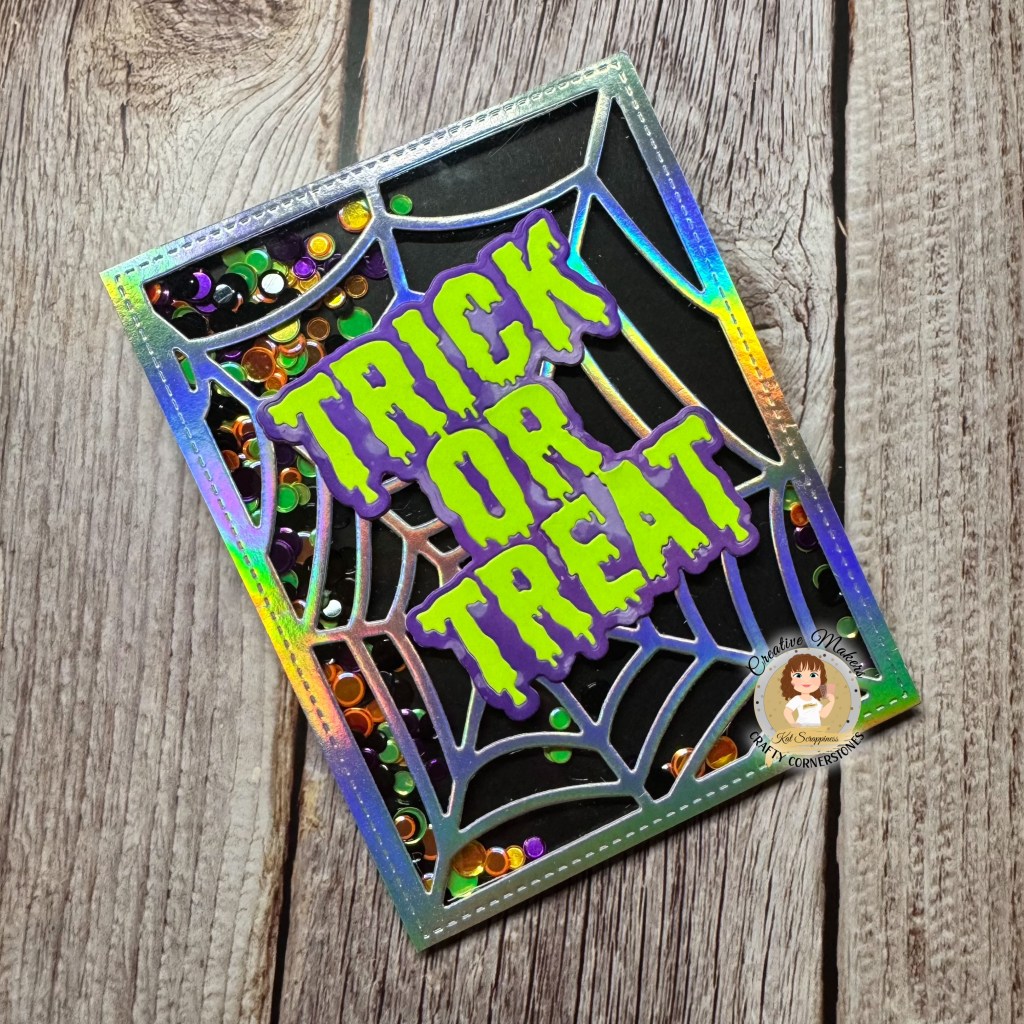
For this project, I created a Halloween-themed shaker card—and it came together surprisingly easily.
Designing the Spider Web Background
Using the Kat Scrappiness Spooky Spider Web Background Die, I cut an A2 panel that would serve as the shaker’s front. I adhered acetate behind the die-cut using double-sided tape, trimming any excess.
For the shaker walls, I used black foam tape—doubling it up to give the sequins room to move. If you only have white foam tape, you can color the edges with a black alcohol marker. Before sealing it, I ran my antistatic tool around the edges so the sequins wouldn’t stick.
Filling the Shaker
With the panel flipped face down, I poured in a generous amount of Halloween Solid Confetti Sequin Mix from Kat Scrappiness. Then I sealed the back with black cardstock slightly larger than A2, trimming it after for a clean fit.
Creating the Sentiment
Now that the base and shaker part of the card were complete, I moved on to the “Trick or Treat” sentiment using the Kat Scrappiness Spooky Trick or Treat Die. I wanted a purple outline with bright green words in the center, so I needed to cut the die three times for paper piecing:
- Purple cardstock for the shadow base.
- Bright green cardstock for the letters.
- A custom ink-blended purple piece for a patterned outline.
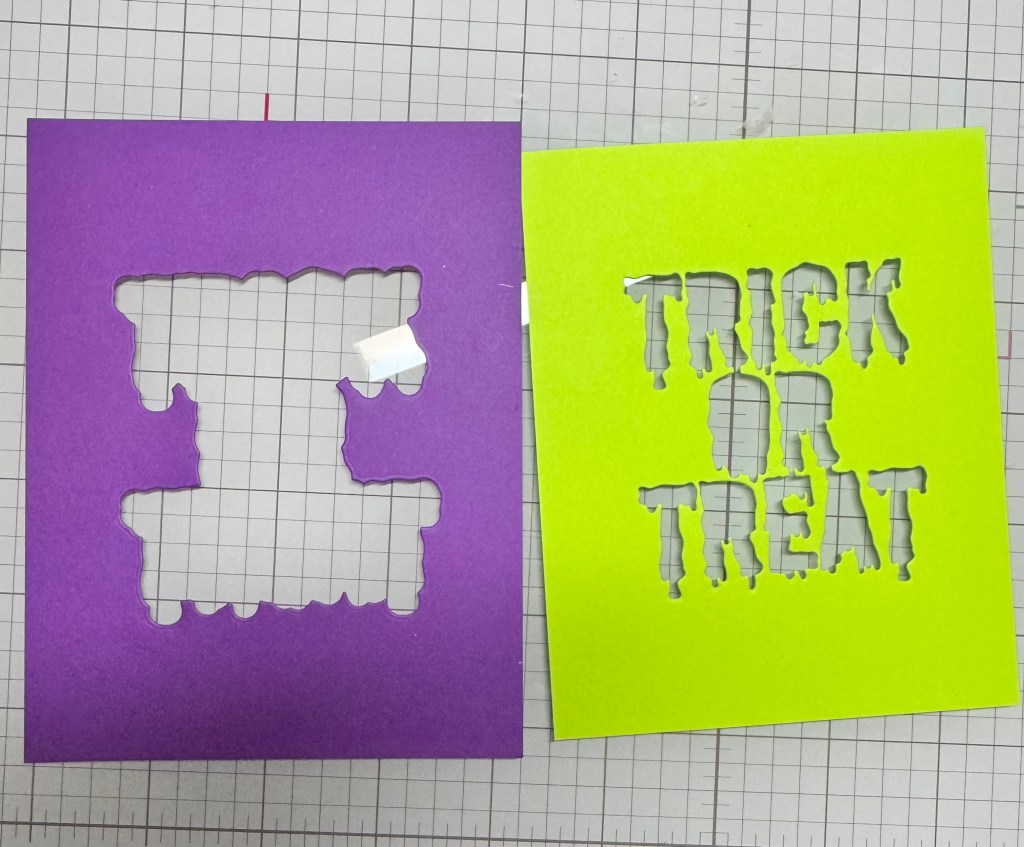
Before cutting the patterned outline, I created it by ink-blending Villainous Potion Distress Oxide onto white cardstock, then splashing water to lift some color for a distressed look.
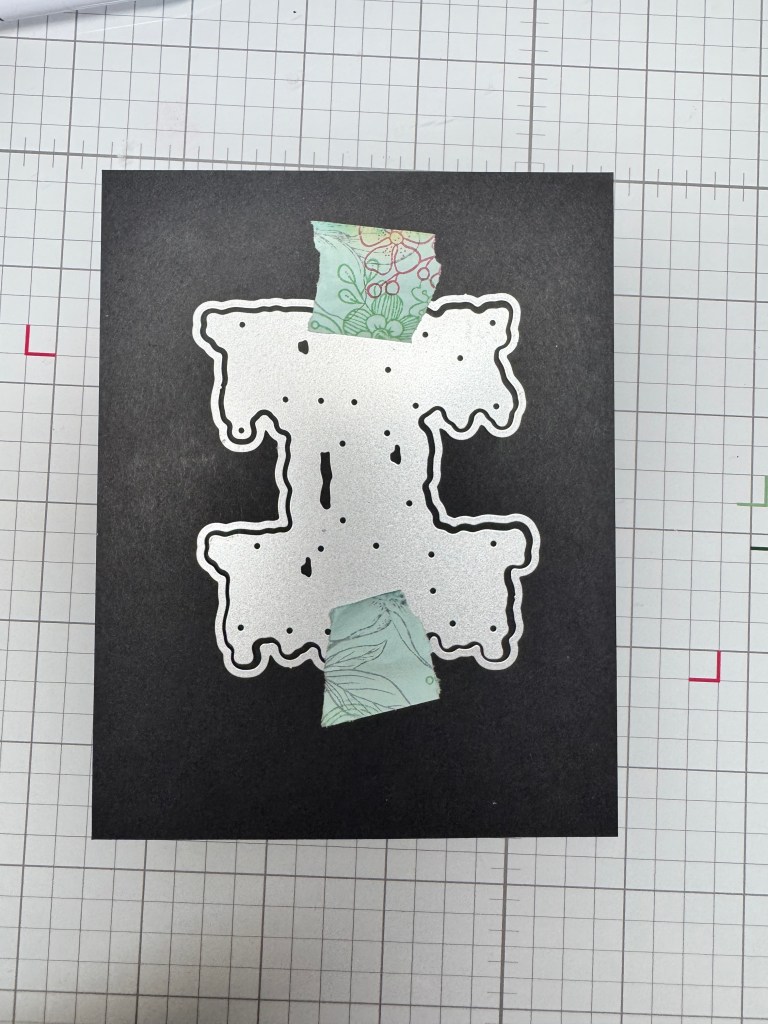
To make the perfect outline for paper piecing, I used a magnet board to hold everything in place. I placed the shadow die face down on the magnet, then centered the word die over it and secured it with Mint tape. Placing it upside down allows the tape to be on the back, away from the cutting edges. This method cleanly cuts the outline while keeping it perfectly aligned, making it easy to piece the green letters back in.
When cutting the distressed purple piece, I made sure to save all the small inner parts of the letters (like the inside of the “a,” “e,” and “o”). After cutting, I glued the purple outline to the purple shadow base, then carefully glued the green letters and inner pieces into place.
Once the sentiment was assembled and dry, I attached it to the spider web shaker panel using both glue and double-sided tape for secure adhesion.
Finishing Touches
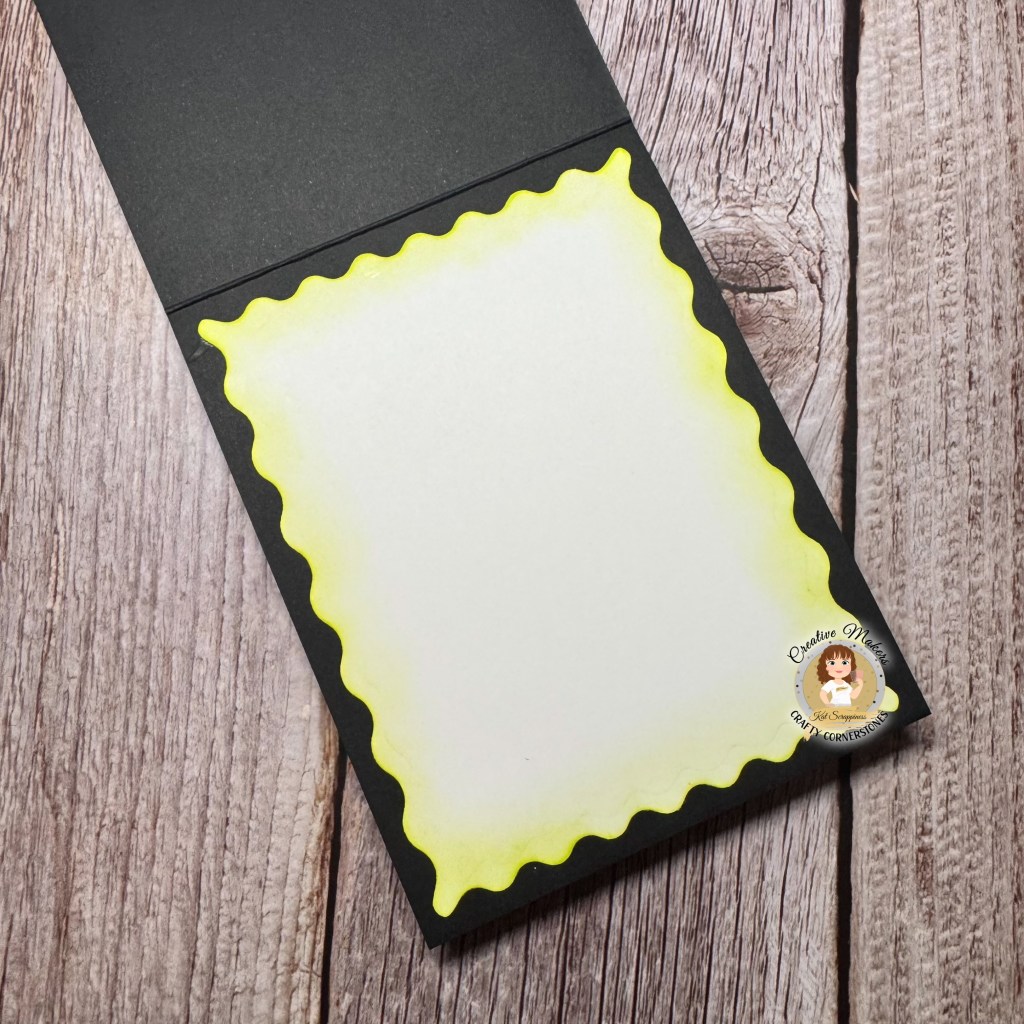
I adhered the finished shaker panel to a black card base. For the inside, I cut a white panel with the Kat Scrappiness Embossed Wavy Edge Frame Die and ink-blended the edges with Gina K Key Lime Ink to match the green from the front.
This Trick or Treat shaker card has just the right mix of spooky and fun, making it a perfect Halloween greeting. Whether you’re making one to send or to keep, it’s sure to bring a smile—and maybe a little “boo!”—to whoever receives it.
Supplies Used
- Kat Scrappiness Halloween Solid Confetti Sequin Mix
- Kat Scrappiness Spider Web Background Die
- Kat Scrappiness Spooky Trick or Treat Die
- Kat Scrappiness Embossed Wavy Edge Frame Die
- Gina K Key Lime Ink
- Distress Oxide Villainous Potion Ink
- Matte Silver, White, Black, Purple, and Lime Green Cardstock
- Acetate
- Bearly Arts Glue
- Double-Sided Tape
- Black Foam Tape


Leave a comment